Oh how good it is as a buyer when you can customize or choose different options for the listing that you wanted. If these are shirts, I could choose different colors or if these are shoes, then I could choose different sizes.
As a seller, it doesn’t only give you more sales, but you are also provide good customer service for your buyers. In this tutorial, we are going to walk you through on how to create variations to an existing listing.
Before you create a variation on an existing amazon listing, you need to know the parent-child relationship first which is explained on our previous tutorial. All of the child listings needs to be created first before creating a parent listing or a variation listing.
What we are going to do is to create a parent listing using an existing child listing. In this way we can save time in creating a listing because all of the descriptions and details are carried over to the parent listing. The only thing that we need to add are the child listings vital info.

Create Variations to an Existing Amazon Listing
Login to your account
Login to your account first at sellercentral.amazon.com
Choose the Listing to be Copied
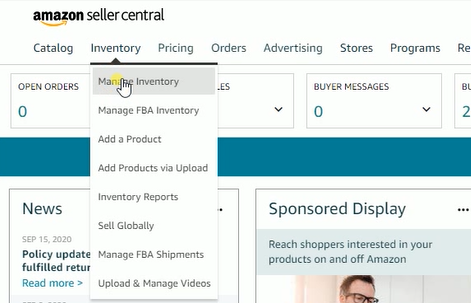
Go to your inventory page by clicking the Inventory Tab on the upper-left and select Manage Inventory on the drop-down. You should see the list of all your listings on Amazon.

Choose a listing on where you wanted to create your parent listing or your variation listing and click the down arrow on the right, then choose Copy Listing on the drop-down.
Sometimes a possible matching notice will pop-up. If that happens then just choose “Return to Form”.
Add The Variations
As you can see on the vital info, it is going to require you to add a product ID. Since this is going to be a parent listing or a variation listing, then we’ll be skipping that and proceed to the variations tab.
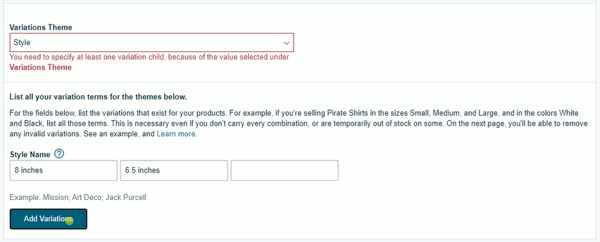
On the Variations tab, select the variations theme. You can choose between color, colorname, displayweight and many more. I’ll choose style for this tutorial.
Indicate the Types of Variation
Now indicate the types of variation. Since I choose style, then I’ll just add 2 different style names on the variation. Click the Add Variation link so we can specify or add the vital information for each child variation.

The only thing that are required are the red fields. So you need to fill them out or else, your listing won’t be posted on Amazon. Make sure to use the correct vital info of your child listing that you wish to add. Please don’t interchange them.
After you have filled this out, you will notice that the red notice on the vital info page for the product ID has disappeared. This is because we have added the product ID on the variations tab and this listing is not a physical listing, but a parent listing.
Add the Part Number
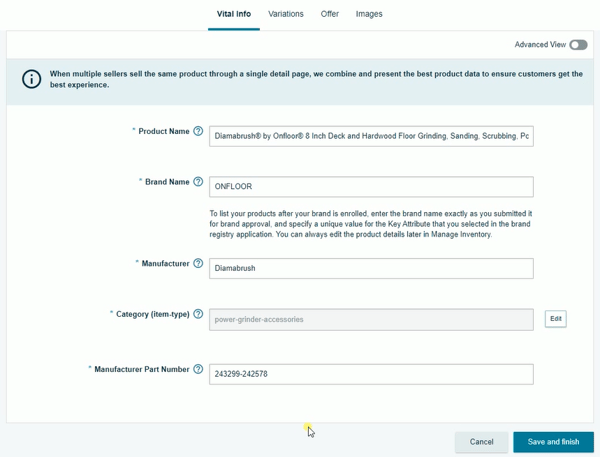
One important thing is to combine the manufacturer part number if it has one. For this case, since we have combined 2 child listings and only 1 part number has shown up, you just need to add a dash and add the second part number.
Fill out Additional Information
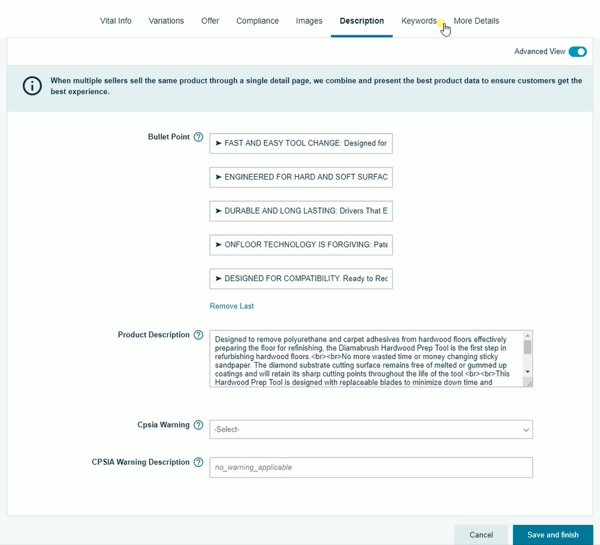
Turn on the Advanced View for the hidden tabs to show up. When you check each tabs, you should see that the information of the child listing was carried over this new parent listing that you’ll be creating. Add the images for your parent listing and review all of the details. Make sure that those information are generic for all of your child listings that is associated with this variation or parent listing.
Post your Listing
Once everything is all set and you have filled out all of the required fields, the Save and Finish button should show up. Just click it to make your listing live on Amazon. It should take about 15 minutes for it to show up.
After you have pushed your listing live, you can check your listing on the Manage Inventory page. It should be grouped as a variation. The first one on top is the parent listing and the ones below it are the child listings.
When your buyer views it on Amazon, they will have an option to select the item that they wanted.
Giving your buyer option to customize their purchase is an act of good customer service.
Create Variations to an Existing Amazon Listing Summary
1. Choose the Child Listing to be Copied
2. Add the Variations
3.Indicate the types of Variation
4. Add the Part Number
5. Fill Out Additional Information
6. Post your Listing
In improving your Amazon's performance, you need to know the top research tools for amazon sellers. as well as knowing what Amazon's Paid advertising is suitable for you. There are also times on where you may need to take advantage for these short-term promotions which is the Amazon Lightning deal.

Watch the video tutorial here:


 Community for E-commerce Sellers


Leave a Reply