
.png)
In this tutorial, we will walk you through how to create an Amazon Listing Variation on Amazon Seller Central.
In creating a variation on Amazon Seller Central, you can either have different listings for each variation or you can combine those listings to create a variation listing. In creating a variation listing, you need to have a Parent and a Child listing. The child listing is an individual listing for each variation, this means that this is a physical product. The Parent listing on the other hand is the one that holds all of the child listings together. In this way, your buyer will have the option to select different variations by just viewing one listing.
Now let me show you how to do this on Amazon Seller Central.
Create Amazon Listing Variation
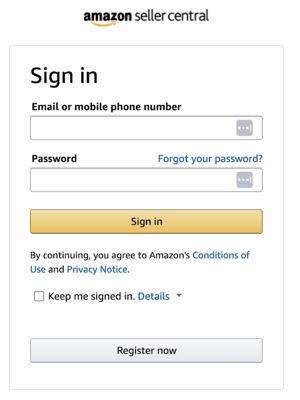
Login to your account
Let’s start by logging in to Amazon Seller Central. That’s sellercentral.amazon.com. Click the Login Button on top and enter your Email or Your Phone Number and the Password of your Amazon seller account. Then click the Sign In button.
Create a Listing
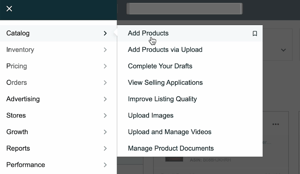
The first thing that we need to do is to add a product. Click the Menu Icon located on the top-left of the page. On the drop-down, hover your mouse over the Catalog and select Add Products.
The Next thing that we need to do is to select a category. What we need to do is to select “I’m adding a product not sold on Amazon” since in this example, we are doing a whole new product.
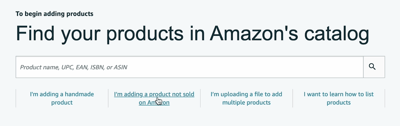
Search for the category of your product in the search field and select the best result. For this example, I’m doing a T-Shirt. So I’ll search for my category and I’ll select the ones that suit best for my category.
Product Identity
The First Part is going to be the Product Identity. Select if the product has a variation or not. So since we have one, then let’s select Yes. Add the Item Name and the Brand Name. Then click the Continue button at the lower right.
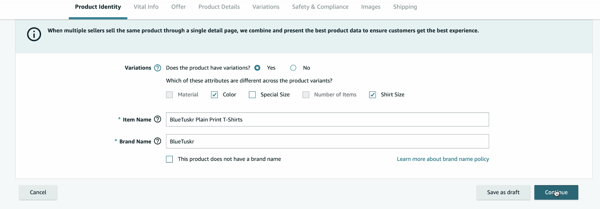
As you can see that tabs have red notices. This meant that there are required fields on that tab that needs to be filled. Let’s go through them one by one.

Vital Information
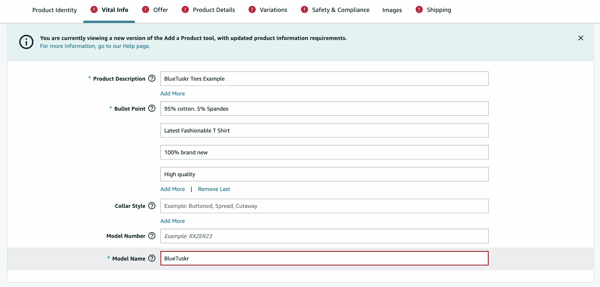
The vital Information Tab is where you can indicate the basic description. Fill in all of the fields. Provide a text description of the product. Add a brief descriptive text on the bullet point and click the Add More link if you have more to add. You’ll see this information directly under or next to your product photo.
Since this is a shirt, you can specify the collar style. Indicate the Model Number if there is any and add the Model Name for this is a required field.
We will skip the offer tab since we will be having variations for this.
Product Details
This is where you can specify additional details for your product. This is for your customers to find your product better. Since what we have are shirts, then we will be specifying details that are related to clothing apparel. In this example, we will be filling out all of the required fields.
So we have Style, Department Name, Target Gender, Age Range Description, Fabric Type, Item Name Type, Fit Type, and Care Instructions. Make sure that you place the correct information so that your customers can easily find your listing.
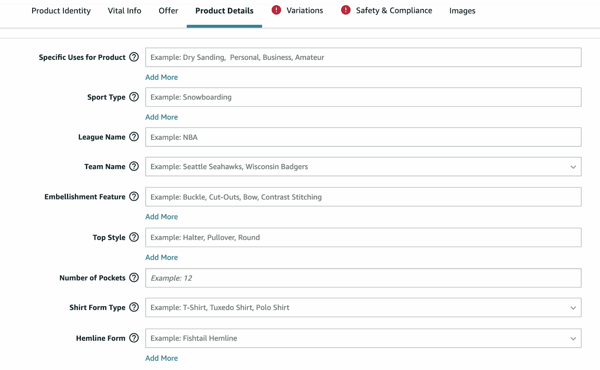
There is an option where the buyer can filter out the results. The product details that you specify in this tab will ensure that you’re getting the correct customers. To make their purchasing selections, buyers rely on vendors. Product Detail pages contain data that is provided by both Amazon and merchants.
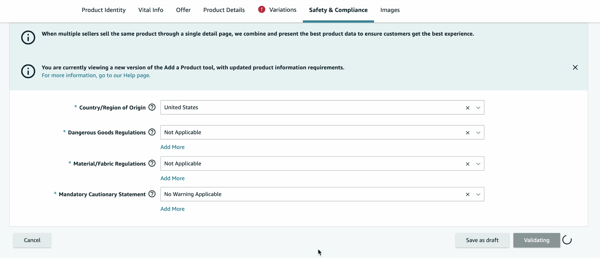
Safety And Compliance
This is where you will be specifying the country. Please fill in all of the fields and specify if there is dangerous stuff in the item that you’re selling.
Variations Tab
Finally, this is where we will be specifying the variations of your product.
Since we are adding different colors and sizes, we will be checking those in the variation type. For this example, we will just specify 2 colors and 2 sizes.
Add The Size
First, you specify the shirt size. Just select the appropriate size of shirt that you’re listing. Once you’ve filled all of the fields, click the Add button at the lower right. You should see the variation set right below the Size Area. Add the second size. For this example, we will add Medium and Large sizes.
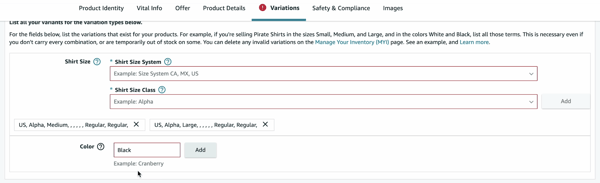
After you’ve added all of the sizes that you’re planning to sell, we will be adding the color. Make sure to add all the sizes first before you add the colors.
Add The Color
Now that you’ve added all of the sizes, we will add the color. Type in the Color of your shirt in the Color Field then click the Add button beside it.
It will automatically add all of those 2 sizes below.
Add the Offer Details
Now that you have all of the variations below, add the offer details. Specify the external Product ID, the type, the offering condition type, its price, and the quantity.
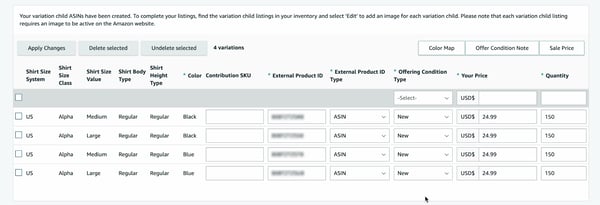
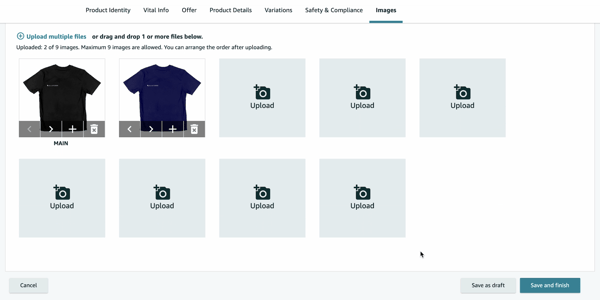
Image Tab
The last one is the Images. Add all of the relevant images to your listing. Click the Upload Image then look and select the image that you’ll be uploading. Do it for the other photos.
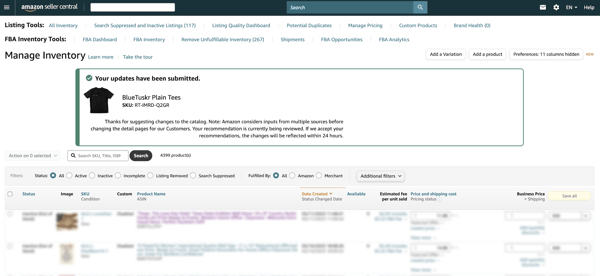
Everything should be all set if there are no other red prompts. Click the Save and Finish button right below to submit the listing for Amazon Approval.
It may take 24-48 hours for Amazon will approve the listing. You should see a green callout confirming that the listing has been submitted. It should be on Amazon once it’s approved and you can then have the sales coming in.
So this is how you create an Amazon listing Variation with color and size. This will work well with Shirts, Shoes, and any apparel that has those 2 variations. See you in the next tutorial. Interested in an Amazon listing optimization service? Contact our team at Bluetuskr, an e-commerce marketing agency.
Create Amazon Listing Variation - Size and Color Summary
1. Login To Amazon Seller Central
2. Add A Product / Create A Listing
3. Fill in all of the Required Fields
4. Add a Variation
5. Review the Details
6. Save the Changes

Watch The Full Video Here:
Connect With Us
Recent Post

- Oct 28, 2023
- Author: Andrew Maff
Tips and Best Practices in Designing the Shopify Homepage

- Sep 12, 2023
- Author: Andrew Maff
How to Use Shopify AR & 3D Models to Boost Customer Engagement

- May 15, 2023
- Author: Andrew Maff
How to Start a Free Shipping Promotion on Shopify - Updated 2023


Tell us what you think!