.png)
When blogging began in 1994, this was more of a memoir that people shared online. They can talk about anything under the sun. But as time goes by, people saw great potential in how they can take advantage of this means in sharing their information on the internet. Today, you can see blogs for almost everything. It can be official news, about fashion, education, marketing, and more. Having a blog nowadays will create an impression that you show thought leadership and expertise on a topic.
Having a blog is a great way of creating new content. By having your own blog, you will have the opportunity to have keywords that will attract the right audiences and boost's your SEO standing. It also will allow you to develop your brand personality by having content that would benefit your audiences. Blogging is also a great way of attracting attention on social media because your article can give your audiences something to talk about.
Now you know the importance of having a blog, let's walk you through creating a blog on Shopify and some best practices to follow.
Create a Blog Post on Shopify
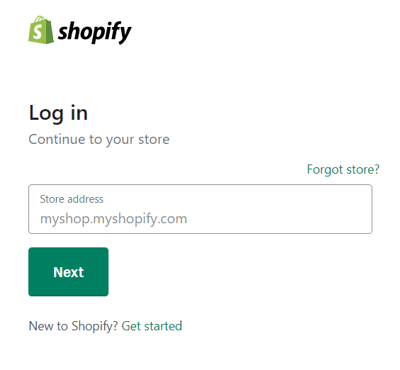
You can start by logging in to your Shopify Account at www.shopify.com. Just select your store and enter your password.
Access The Blog Creation Tool
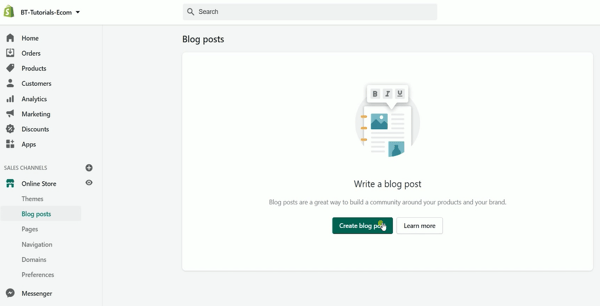
Once you're in the Shopify Admin, click the Online Store sales channel on the left and select Blog Post on the link menu. As of now, we don't have an active blog yet and to start creating one, click the Create Blog Post button.
Create Your Content
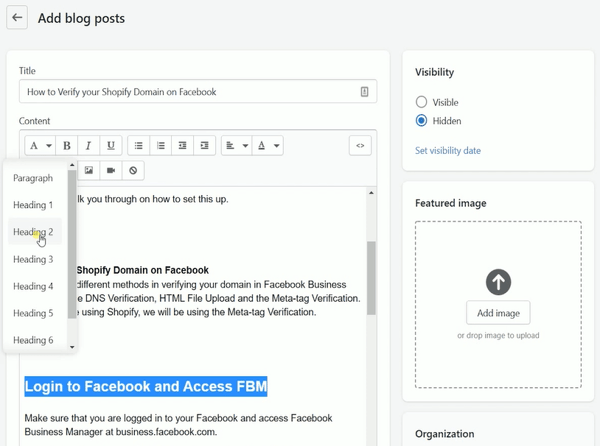
So this is Shopify's blog creation tool.
Enter your Blog Title on the title field.
In the content field, this is where you can start writing for your blog. I already have created my text content for this. So I'll just copy and paste it into this field. Like any other text editor, you can just put a space on each paragraph by pressing "Enter". By having this white space, your blog is easier to read.
Manage Your Page Structure
The next thing that you can do is manage your page structure. It is basically just labeled as Headings from 1-6 representing the most important idea on the page which is the Title that's represented as Heading 1, and sub-sections organized with Heading 2. Those sub-sections can themselves be divided with Heading 3, and so on. It is best to plan out a heading structure before composing a page. Doing so will help you both select appropriate heading levels and keep your thoughts organized overall.
All of the indentation, text styles, bulletin, and numbering are available on the toolbar on top.

Add Images
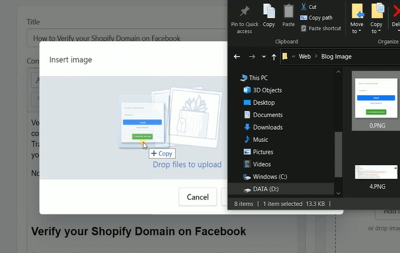
The next thing that we want to do is to spice up your blog by adding images. You can add them by clicking the image button on the toolbar.
You can then select or drag your files to the gallery to upload them to your Shopify's media library.
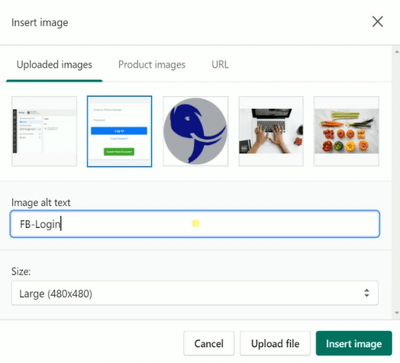
Once you have the image that you wanted, you can select it and add an Alt-Text. This alt-text will help you provide better image context/descriptions to search engine crawlers, helping them to index an image properly. Always make it a habit to add an Alt-Text to all of your images because this will also help you boost your SEO Ranking.
Next is to add a Featured Image to your blog. This is the top-most image or the thumbnail that your readers can see if your blog is posted on social media. Just drag and drop the image that you wanted to the Featured Image section.
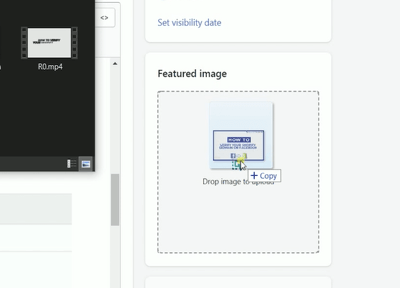
You can change or remove the image anytime by just clicking the update link below it and select your action.
On the Organization field, this is where you can add the author of the blog, select its category and add tags.
Edit The Search Engine Listing for a Blog
The search engine listing preview section is where you can edit the appearance of your article on search engines. Just click the website SEO to edit it. The page title is added in default.
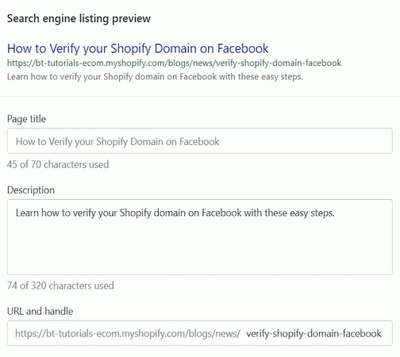
The description is where you can add a brief overview of what your blog is all about. It is a good practice to keep your description short and concise and keep it below 150 characters because most search engines can't display characters after 150.
The URL and handle are the slugs or the website link that you set for your blog. I recommend that you place the important keywords on your title and keep it short.
Add a Video
The last thing is somehow optional but we will tackle it. It is about adding a video to your blog. You can go back to the content field and go to the space where you will be adding the video. Then click the Video icon on the toolbar. A pop-up will show up asking for an embed snippet.
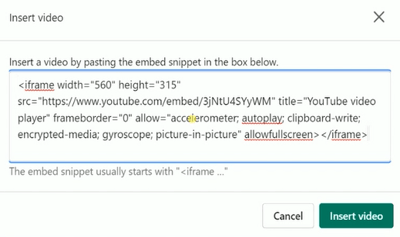
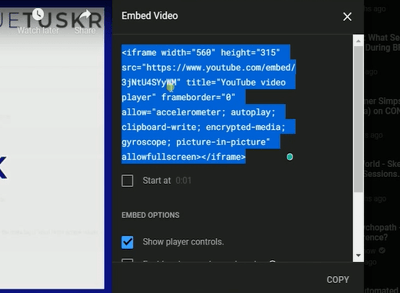
This feature is mostly available on video hosting sites such as YouTube or Vimeo. Sometimes it is also available in videos posted on social media sites such as Facebook or Instagram. For this example, we go to the YouTube video and click the Share button below the video. Click the Embed icon on the selection and copy and paste the snippet on Shopify then click Insert Video.
You should then see your video added to your blog.
Publish or Schedule your Blog
You can set your blog to be visible right away or you can set it to be published at a later date.
After you have reviewed your blog article, you can just click Save to create the blog.
You can view your post by clicking the View On Your Online Store link on top.
So that ladies and gents are the steps on how to create a blog on Shopify. Contact our team at Bluetuskr, an e-commerce marketing agency for your e-commerce SEO services!
Create a Blog Post on Shopify Summary
1. Log in to Shopify
2. Access the Blog Creation Tool
3. Create yourContent
4. Manage your Page Structure
5. Add Images
6. Edit the Search Engine Listing for a Blog
7. Fill Out the Required Fields

Watch the video tutorial here:
Connect With Us
Recent Post
- Oct 28, 2023
- Author: Andrew Maff
Tips and Best Practices in Designing the Shopify Homepage

- Sep 12, 2023
- Author: Andrew Maff
How to Use Shopify AR & 3D Models to Boost Customer Engagement
- May 15, 2023
- Author: Andrew Maff
How to Start a Free Shipping Promotion on Shopify - Updated 2023


Tell us what you think!