.png)
In this tutorial, we will walk you through how to edit your listing and product information on Amazon Seller Central.
Have you ever wondered where to go when you need to update your listing? Or, which is which! Where can I find this detail? I want to specify that I am compliant with the standards. Well, this tutorial is one of the basics that you need to know as a seller on Amazon. Let’s get into it.
EDIT AN EXISTING AMAZON LISTING & PRODUCT INFORMATION
Login To Seller Central
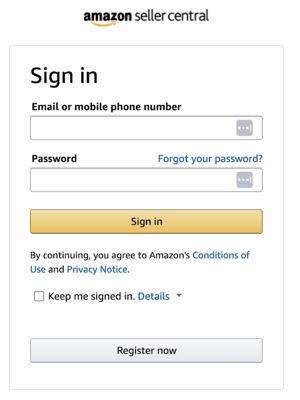
Let’s start by logging in to Amazon Seller Central. That’s sellercentral.amazon.com. Click the Login Button on top and enter your Email or Your Phone Number and the Password of your Amazon seller account. Then click the Sign In button.
Access The Manage Listing Page
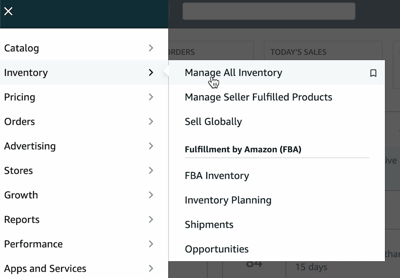
Now you’re on the Main Dashboard. What we need to do next is to access the Manage Listing Page.
Click the Menu Icon on top and on the Menu, hover your mouse to Inventory and select Manage Inventory on the selection.
This is the Manage Inventory Page. You can do a lot of things here with your listings but for now, we’ll edit a listing.
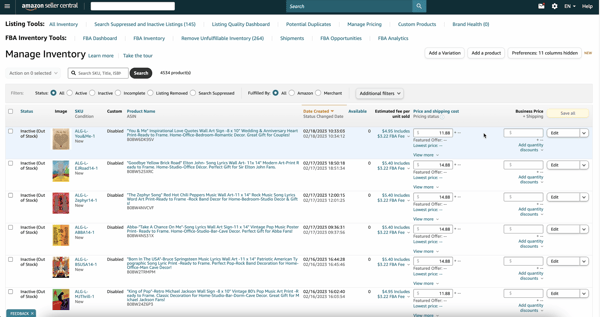
Choose the listing that you wish to edit. Right away, you can edit the price of your listing in the Price and Shipping Cost column. But if you wish to edit some other details of your listing, you can click the Edit button right beside the listing.
If the Edit button is not available, click the drop-down menu right beside it and select Edit.
Edit Your Listing
There are a couple of tabs, but you’ll start at the Offer Tab.
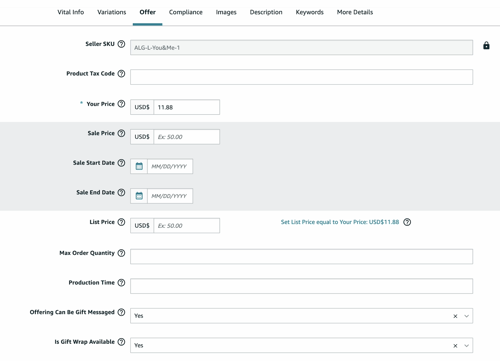
Offer Tab
The Offer Tab is where you can manage the pricing of your listing. This is where you can set the current price of your item. You also have the option to set up a sale price on the said dates if you wish to. You can as well set up the maximum order quantity, indicate the production time, and set up the gifting. So. This is the Offer Tab.
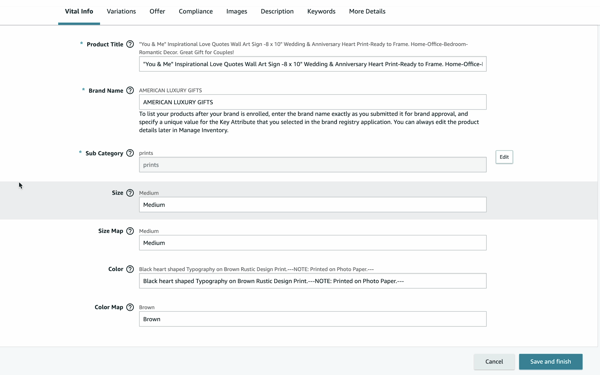
Vital Info Tab
The Vital Info Tab is where you’ll be able to edit the main information As you notice, there are items with an asterisk (*). There are the required fields. This means that something must be in there and it needs to be accurate and correct.
Variation Tab
The Variation tab is where all of the variations will be shown. We don’t have a variation for this listing that’s why it’s empty. We’ll have a different tutorial for that.

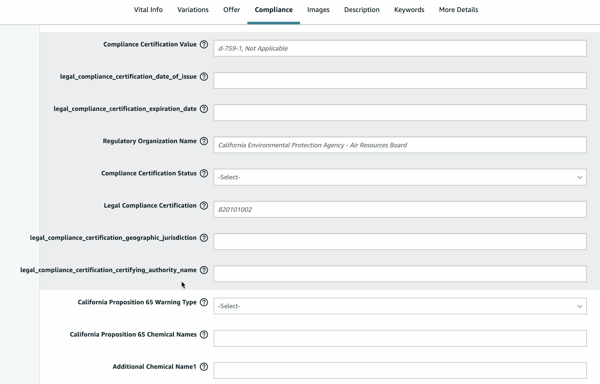
Compliance Tab
The Compliance Tab is where all of the certification details need to be. This is mostly used if you are selling something related to chemicals or food. If your product needs to comply with the standards, then this is the tab that needs to be filled.
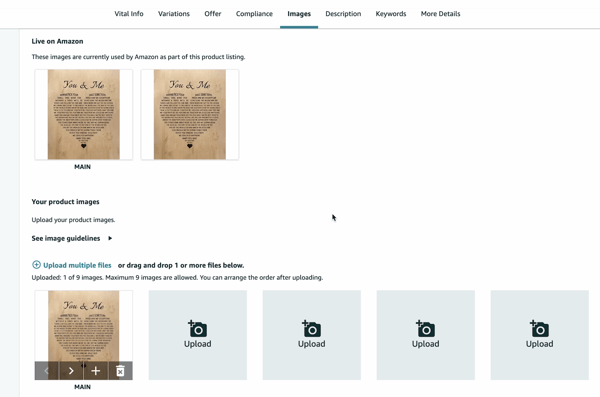
Images Tab
The images tab is where you can manage your images. This is where you can upload, delete, and arrange the image sequence.
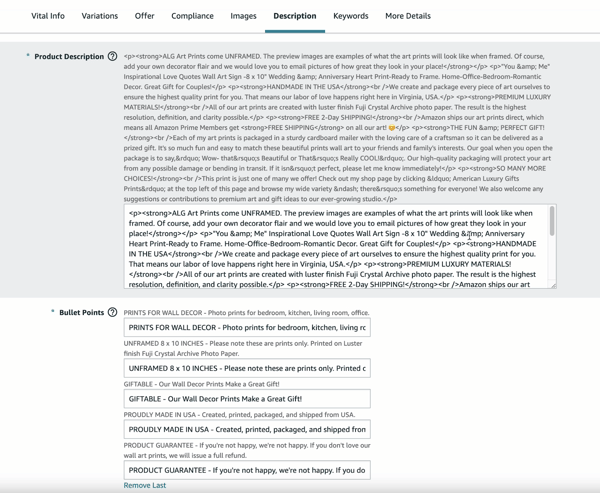
Description Tab
The Description tab is where you can edit your product description. This should be the Marketing Pitch for your product. Your product description plays a big impact on winning the Buy Box. Make sure that you add SEO-rich keywords to your description so that it allows you to drive free traffic through Amazon’s organic search.
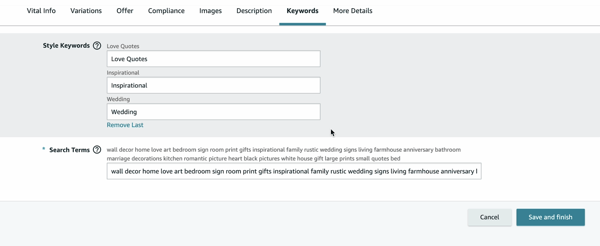
Keywords Tab
The Keywords Tab is for the search terms keywords. In order for customers to find your products on Amazon, it’s important to provide Search Terms they might use when searching for what they want to buy.
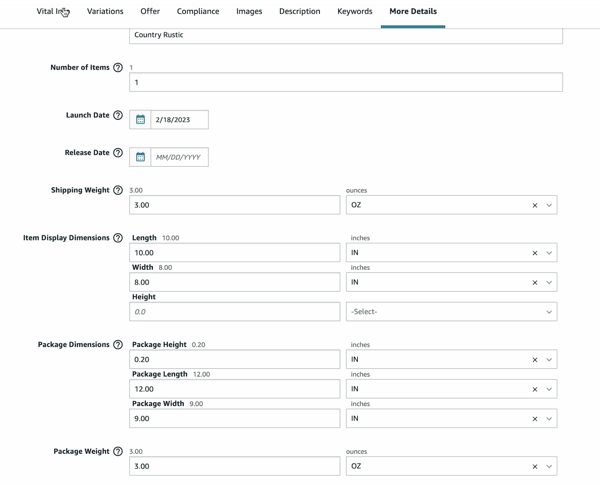
Details Tab
Lastly is the More Details tab. This is where you can indicate other details of your listing that you didn’t specify. This consists of your product weight, size, and dimensions.
Save And Finish
After you went over all of the tabs and after you have edited or updated your listing, the only thing left to do is to save the changes. Click the Save and Finish button at the bottom to finalize the changes.
It should give you a prompt that the detail page will reflect the changes. Just click Done.
And Finally, the prompt will show up indicating that the updates have been submitted please allow Amazon a maximum of 24 hours to update the listing.
So there you have it! We just went through the tabs for editing your Product Listing. If you want to know more about how to improve your listing quality, you might want to check our previous tutorial.
See you soon in our next tutorial.
Edit an Existing Amazon Listing & Product Information Summary
1. Log in to your Seller Central account
2. Choose the listing to edit
3. Edit Your Listing (Go Through All of The Tabs)
4. Review The Changes
5. Save and Finish
So that sums up this tutorial. That’s how you update your product listing on Amazon Seller Central. You need to know this by heart because you may need to do this every time. Interested in an Amazon listing optimization service? Contact our team at Bluetuskr, an e-commerce marketing agency.
Watch the video tutorial here:
Connect With Us
Recent Post

- Oct 28, 2023
- Author: Andrew Maff
Tips and Best Practices in Designing the Shopify Homepage

- Sep 12, 2023
- Author: Andrew Maff
How to Use Shopify AR & 3D Models to Boost Customer Engagement
- May 15, 2023
- Author: Andrew Maff
How to Start a Free Shipping Promotion on Shopify - Updated 2023


Tell us what you think!