.png)
Having a Conversion Tracking on your Shopify can be daunting or challenging to setup. Especially if you didn’t know the scripts that you wanted to implement and where it needs to be added. We all know that “Conversion” is what every online advertiser wants. Any click that ends with the action that is desired for the business. A purchase, an email subscription, or just merely a confirmation of an appointment coming from an ad is counted as a Conversion and the main reason for having a Google Ads Account.
Every ads campaign that you’re running for your website needs to be track. You have to know what searches, ads, products, and audiences succeed or fail at bringing in your ROAS goal. Google Ads conversion tracking is to get the most value out of their advertising efforts. The connection between a customer encountering an ad and purchases becomes more clear with tracking code setups.
With this tutorial, we’ll walk you through in adding a Google Ads Event Conversion Code to your Shopify Store. Interested in commerce paid advertising services? Contact our team at Bluetuskr, an e-commerce marketing agency.
Add the Google Ads Event Conversion Code to Shopify
What we basically need to do is to choose an event and generate the code then apply it to Shopify.
Login to Google Ads
You can start by logging in to your Google Ads account at ads.google.com. Make sure that you select the correct ad account.
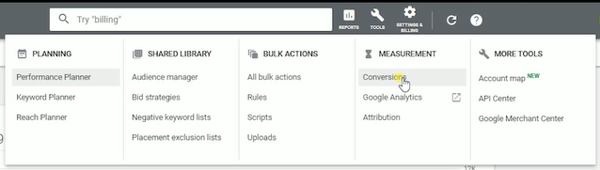
Once you’re in, navigate to the Conversions Action. You can do that by clicking the Tools Icon located on the top right of the page and under the Measurement Section, click Conversions.
This is where you should see all of the conversion reports and actions that you have created. Now let’s create one and generate the appropriate code.
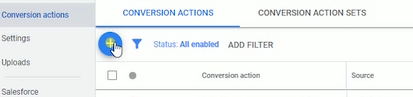
Create a New Conversion Action
Click the Plus (+) icon to create a new conversion action located on the upper left.
Then choose “Website” on the selection since this code will be applied to the website.
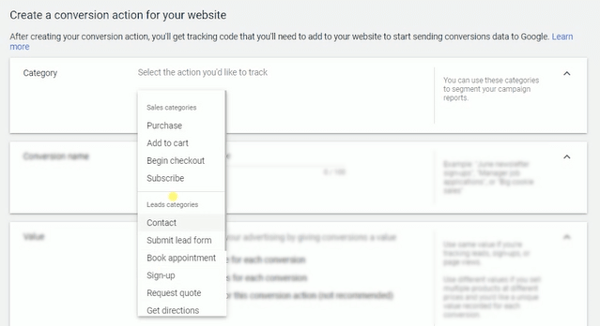
Create an Action
First is to select the category that you wanted to track. These are categories that classify actions like Purchase, Add to Card, Begin Checkout, Subscribe and many more.
Next is to Enter a Conversion Name for the conversion that you will be tracking. This will help you recognize this conversion action in the conversion reports.
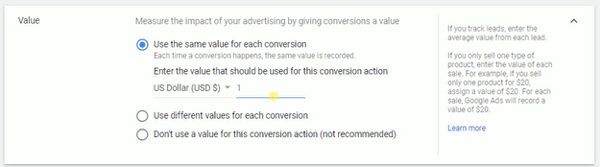
Next is “Value”. Select how to track the value of each conversion.
You can either use the same value for each conversion and enter the amount each conversion is worth to your business. You can also use different values for each conversion. Use this option if, for example, you’re tracking purchases of products with different prices or you can choose to not use any value.
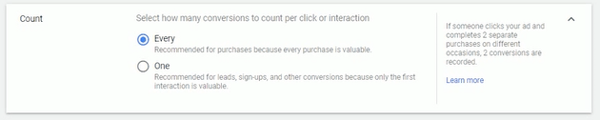
Next is “Count”. Select how to count these conversions.
For One, this setting is best for leads, such as a sign-up form on your website, when only one conversion per ad click likely adds value for your business.
The Every setting is best for sales, when every conversion likely adds value for your business.
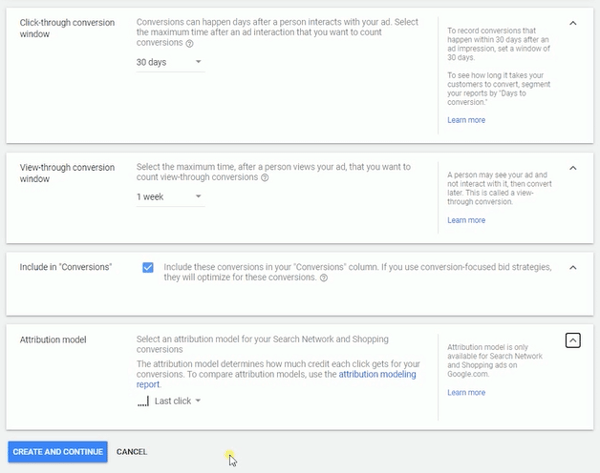
Click on the Click-through conversion window and select how long to track conversions after an ad interaction from the drop-down. For Search, Shopping, and Display campaigns, the window can be 1 to 90 days.
Click on the View-through conversion window and select how long to track view-through conversions from the drop-down. For Search, Shopping, and Display campaigns, the window can be 1 to 30 days.
For the Include in “Conversions”, this setting is selected by default and lets you decide whether or not to include data for this conversion action in your “Conversions” reporting column. If you uncheck this setting, data will still be included in the “All conversions” column.
Once everything is all set, click the Create and Continue button.

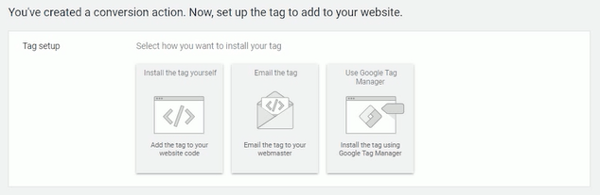
Setup the Tag
To set up website conversion tracking for the first time, you’ll need to add 2 code snippets to your website: the global site tag and the event snippet.
What we need to do is to install this tag all by ourselves so select that option.
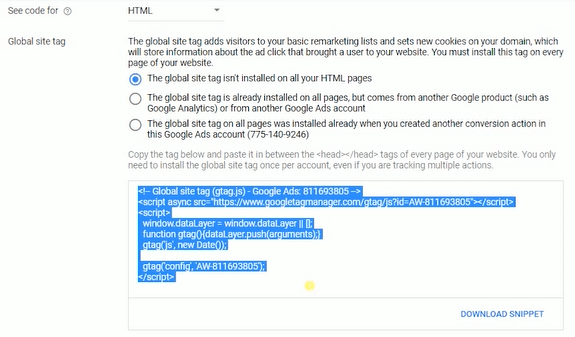
So we have 2 tags codes here. The Global Site tag and the Event Snippet. We’ll install the Global Site Tag first. So make sure to copy the Global Site Tag.
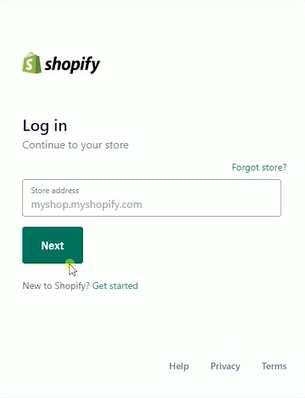
Next thing that you need to do is to login to your Shopify account at www.shopify.com.
Global Site Tag
Once you’re in, click the Online Store on the Sales Channel.
Under the Themes section, click the Actions drop-down and select Edit Code.
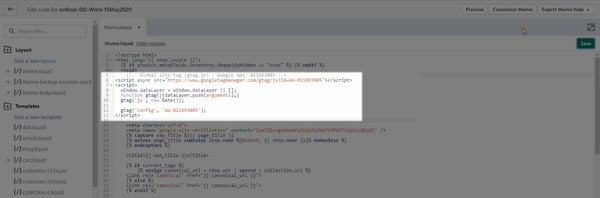
Make sure that you’re on the theme.liquid layout. What you need to look for the opening <head> and closing </head>. Paste the global site tag in between them. I recommend that you place them just right below the opening head so you won’t mess up other tags.
Add The Event Snippet
After you install the global site tag, you need to add the event snippet to your checkout page. The event snippet tracks a conversion any time somebody clicks one of your ads and then later reaches the checkout page on your online store.
Make sure to Copy the Event Snippet on Google Ads.
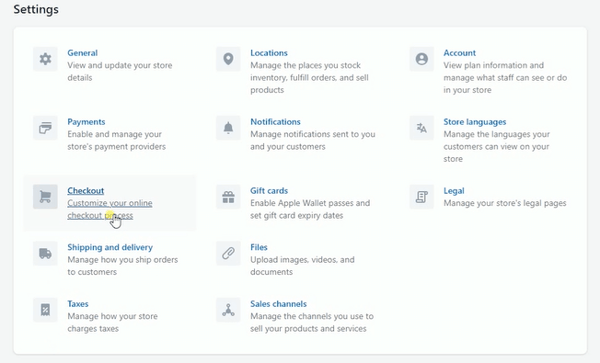
Go back to Shopify Home and click Settings at the bottom left of the page and select Checkout on the selection.
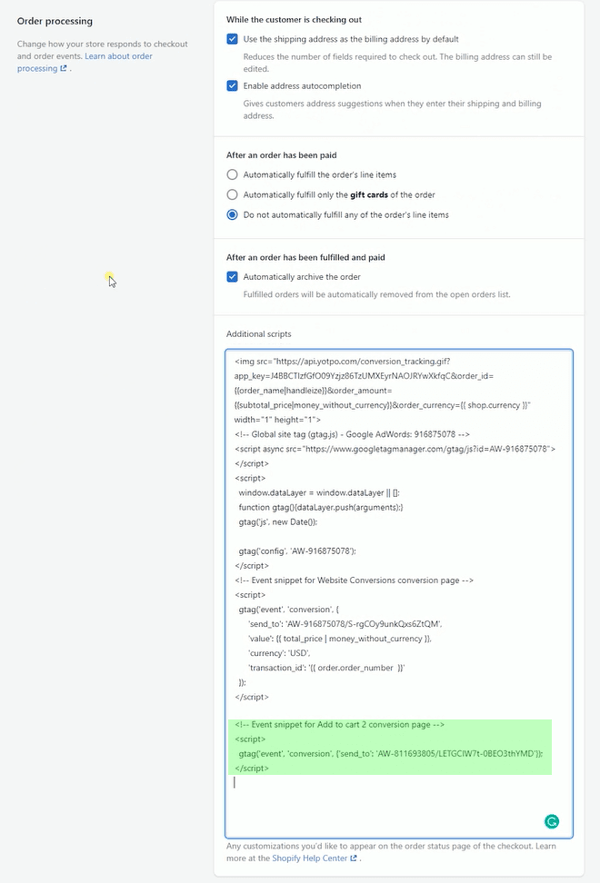
Go to the Order Processing section then you need to add the Event Snippet to the Additional Scripts field. As you can see, we have the Global Site Tag and the an existing Event Snippet. Just add the new event snippet after the closing script tag.
After you have added it, just click Save and it should do the trick.
It can take up to 24 hours for conversion data to start appearing in Google Ads. Take note that if customers don’t have cookies enabled in their browser when they click on your ad and complete the conversion, Conversion Tracking won’t work.
That should be everything that you need to know in adding the Google Ads Event Conversion Code to Shopify.
Add the Google Ads Event Conversion Code to Shopify Summary
1. Create a New Conversion Action
2. Create an Action
3. Setup the Global Site Tag
4. Setup the Event Snippet

Watch the video tutorial here:
Connect With Us
Recent Post
- Oct 28, 2023
- Author: Andrew Maff
Tips and Best Practices in Designing the Shopify Homepage

- Sep 12, 2023
- Author: Andrew Maff
How to Use Shopify AR & 3D Models to Boost Customer Engagement
- May 15, 2023
- Author: Andrew Maff
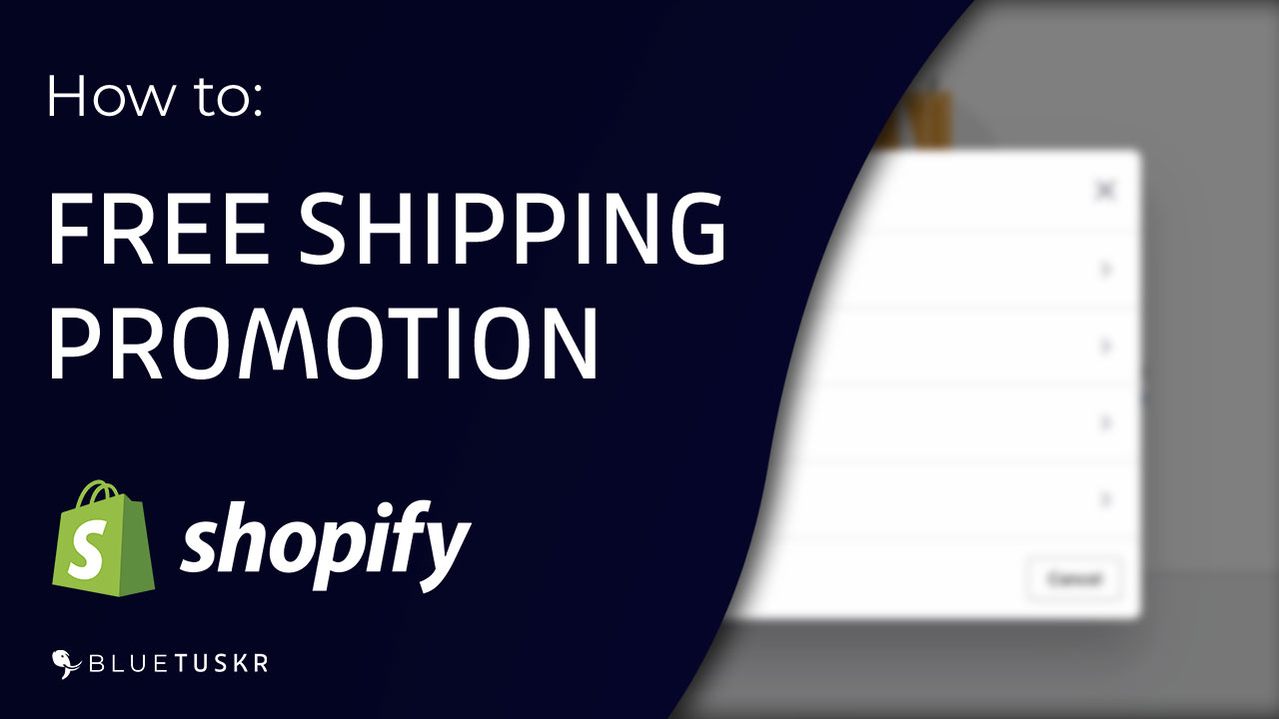
How to Start a Free Shipping Promotion on Shopify - Updated 2023


Tell us what you think!