.png)
The Amazon Listing Quality Dashboard was introduced in August 2020 in an effort to further improve the famous buying experience on the marketplace. This Seller Central tool for merchants analyzes products that are lacking crucial product information for clients and provides suggestions on which features you need to add.
There are a lot of benefits in improving your listing quality such as increasing your listing discovery, making the Product Overview experience available, potentially lowering customer returns, and taking time-sensitive measures. To be aware of any issues, you should verify the listing quality for your items once a week. You may increase sales for a product by fixing its listing quality as soon as possible.
Improve Your Listing Quality on Amazon
In this tutorial, we will walk you through how to improve your listing quality on Amazon.
Login To Seller Central
You can start by logging in to Amazon Seller Central. That’s sellercentral.amazon.com.
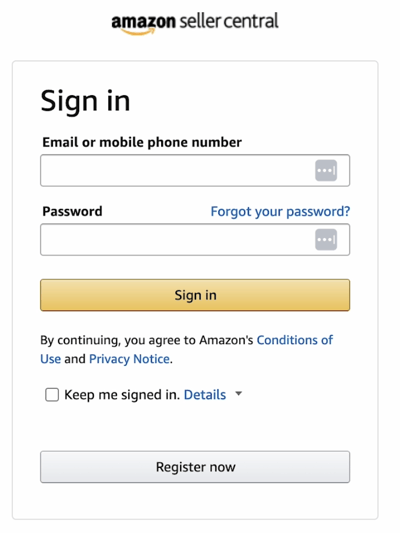
Click the Login Button on top and enter your Email or Your Phone Number and the Password of your Amazon seller account. Then click the Sign In button.
Access the Listing Quality Dashboard
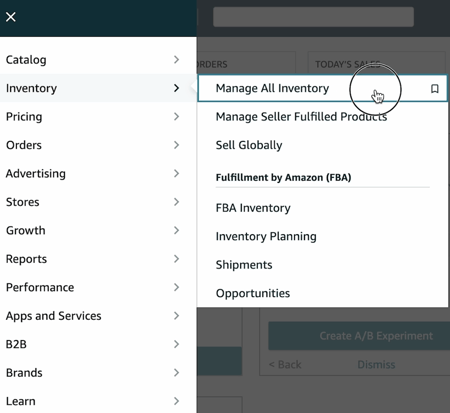
Now that you’re in, what we need to do is to get to the Listing Quality Dashboard. Click the Menu icon at the top-left and hover your mouse over the Inventory and select Manage All Inventory on the selection.
On the inventory page, just in line with the Listing Tools, click or select the Listing Quality Dashboard.
On this page, it will show you the listings that need some improvement. As of this moment, we have 21 listings. We’ll just go through one item.
Improve the Listing Quality
Choose the listing that you want to improve.
On the right column of the listing, you will see the recommendations. Again, these are recommendations and prospects. These are not guaranteed outcomes.
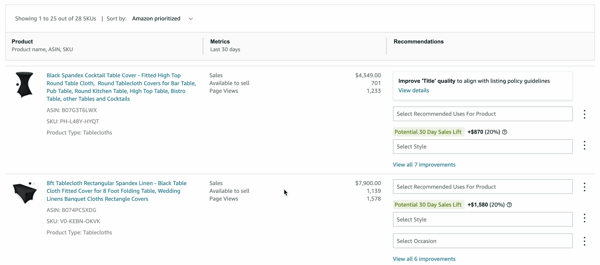
We have 7 improvements that we can do to our listing. Let’s see if those are applicable to the listing. Click the View All Improvements link.
You will be automatically directed to the All tab. For this example, the first one that we have is Item Name.
Item Name – It says that it’s too long and redundant and has duplicate information. Well, we don’t have anything to replace it yet, so let’s leave it as it is for now.
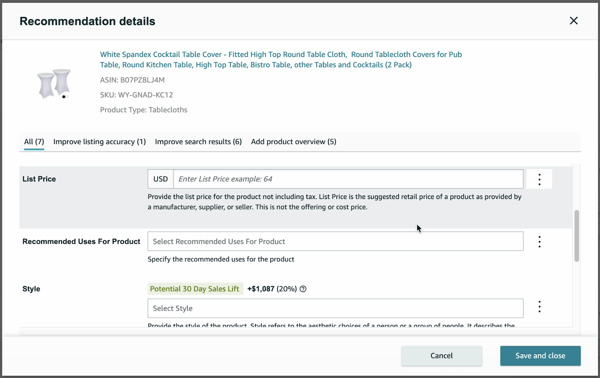
List Price – this is not applicable to the item so we’ll just label this as not applicable to the product. Just click the ellipsis on the right and select the appropriate selection on the drop-down.
Recommended Uses For Product – Well it’s indicated already that it’s a table cloth so you can use this for a round table, it can be anything. So it’s not applicable.
Style – As you can see, the style has a monetary sales lift involved. This is just a prospect. Since designers want to be really specific with what they buy, then this attribute can be used for comparison. So we just need this as Plain or Minimalist and it’s not in the drop-down. So Value is not in the description.
Occasion – it can be on any occasion as long as there are round tables. So it’s not applicable.
Special Feature – Let’s just set it as for a wedding.
Embodiment Feature – Well it’s not really applicable to this product.
Now that you’re all set, just click Save and Close.
You should see a Changes Saved prompt on the item that you have worked on.
And you’re all set.
Please be advised that every category is different. As a seller who specializes in your niche, you should be able to know your products and the vital product attributes that the customer will look for in purchasing your product.

Benefits of Improving your Listing Quality
Now that you have added the recommended information for your listing, here are the things that you have improved:
-Helped Improve its Discovery
Customers will be able to filter their search results by selecting a specific attribute. Since you’ve added your attributes, your listing will show up first once the specific attributes are selected on your product.
-The Product Overview Experience
On the Product Page, the important product attributes will be highlighted. In this way, your customer will be able to decide right away if this is really the product that they need and make a faster buying decision.
-Tabular Spec View in Search
The Tabular Spec View presents important product characteristics on the ASIN face out in a tabular manner, allowing users to rapidly compare items and browse through the top product attributes.
-Compare your Products with Others
Your customers will be able to compare your products with the specification that you have indicated.
-Price Per Unit Attribute
You also can compare prices through different pack sizes. As you can see, we are able to compare these prices per pack or per weight.
-Potentially Reduce Customer Returns
Since you have provided the correct vital info about your product on the product detail page, there will be a big chance of your customer keeping your items.
So there you have it! That’s how you improve your listing quality on Amazon Seller Central. Interested in an Amazon listing optimization service? Contact our team at Bluetuskr, an e-commerce marketing agency.
Connect With Us
Recent Post

- Oct 28, 2023
- Author: Andrew Maff
Tips and Best Practices in Designing the Shopify Homepage

- Sep 12, 2023
- Author: Andrew Maff
How to Use Shopify AR & 3D Models to Boost Customer Engagement

- May 15, 2023
- Author: Andrew Maff
How to Start a Free Shipping Promotion on Shopify - Updated 2023


Tell us what you think!