
How to Start an Amazon Seller Central Account And Start Selling - Updated 2023
Perhaps you already have your own online business and are wanting to expand into a new area. Perhaps you currently sell on a huge marketplace such as eBay and wish to broaden your reach. Maybe you’re just getting started and don’t have a website or any item listings, and you haven’t made a single transaction yet.
And we have Amazon to back you up.
Amazon may be a rewarding platform for any online vendor, regardless of their present financial situation. Actually, if you’re serious about eCommerce, you should try selling on Amazon.com.
In this tutorial, we will walk you through how to get started on Amazon.
Sign Up for a New Seller Account
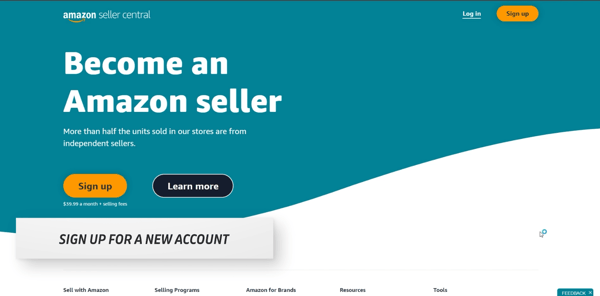
Unlike a regular Amazon account, selling on Amazon is a bit different. You can start by going to sellercentral.amazon.com.
Click the Sign Up button at the top-right or on the left side.
You will then be asked to enter your name, e-mail address, and password for your account.
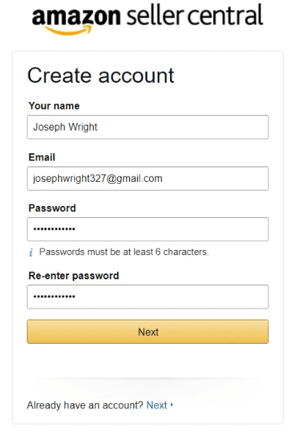
Re-enter your password and click the Next button.
Verify your e-mail address
Look for the e-mail from Amazon enter the One Time Password or OTP.
Then click the Create your Amazon Account button to get started.
Make sure to prepare your Business and Contact Address, Mobile & Telephone Number, Chargeable Credit Card, and Identity Details.
To kick it off, select the business location and the business type. Enter your Name (You can’t change this after).
Then click the Agree and Continue button.
Provide Your Personal Information
Enter your Personal Information on the next page. Just fill in the field and check the confirmation boxes.
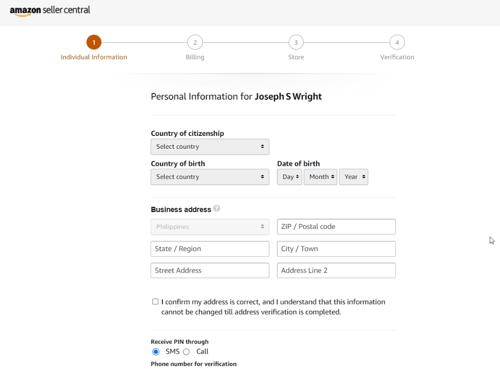
Enter your phone number and click the Send SMS button.
Enter the One Time Pin that you receive on your Phone and click Verify.
Provide Your Business Information
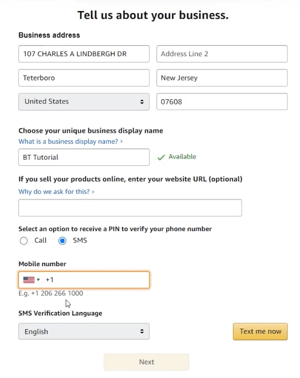
Fill out the form, choose your business name, enter your phone number, and do another OTP.
Set up your Billing Method
Enter your Card number. This is where Amazon will be charging you monthly.
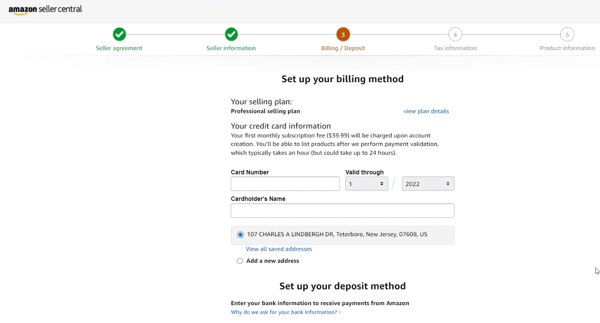
You also need to set up your deposit method. This is where Amazon will send you your payment so you better make sure this is accurate.
Click Next to proceed to the next page.
Provide your tax information
Click Start to fill out the Tax Interview.
Fill out all of the fields and answer all of the questions.
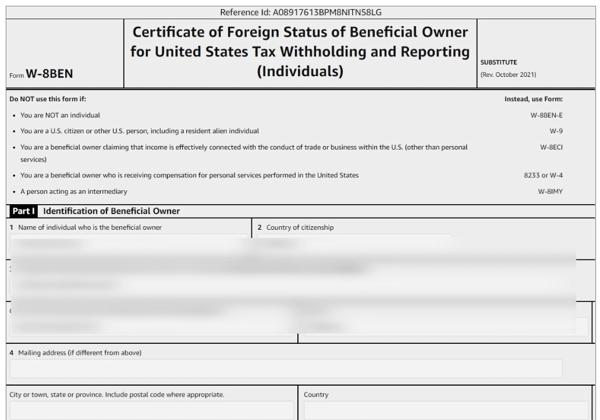
Once you have filled out the form, click the Submit form.
Once it’s successfully validated, you can now exit the interview.
Indicate Your Product Type
The next one is about your products. Just let amazon know what are you planning to sell.
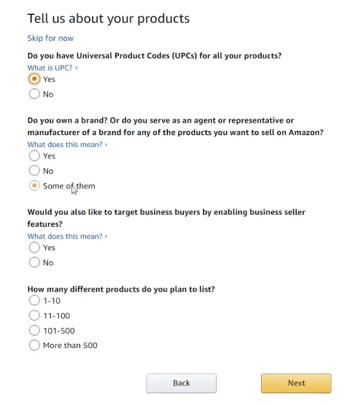
Last is identity verification. Just follow through the steps and everything should be set.
You can now start uploading products on Amazon.
Watch out for our next video for more Amazon content. For more information and if you need assistance in setting this up or on how to keep this going, we here at BlueTuskr are ready to help. Till the next tutorial.
Watch the Full Video Here:
Connect With Us
Recent Post
- Oct 28, 2023
- Author: Andrew Maff
Tips and Best Practices in Designing the Shopify Homepage
- Sep 12, 2023
- Author: Andrew Maff
How to Use Shopify AR & 3D Models to Boost Customer Engagement
.png)




Tell us what you think!