.png)
Chatbots have been on the rise for a few years and have already gained widespread acceptance. Chatbots have risen as a result of advances in machine learning and artificial intelligence. In just two years, more than 300,000 chatbots were introduced to Facebook Messenger! Chatbots, like anything else, have several pros and downsides but one that stands out is ManyChat.
With the increasing popularity of messaging apps, the faster development of all types of sensors and wearables, and, of course, the emergence of emerging technologies and AI, they are providing a new method for companies to interact with the world and, most importantly, with their consumers.
Manychat's biggest feature is its easy-to-use chatbot flow creator. It also integrates with Facebook Messenger directly and seamlessly.
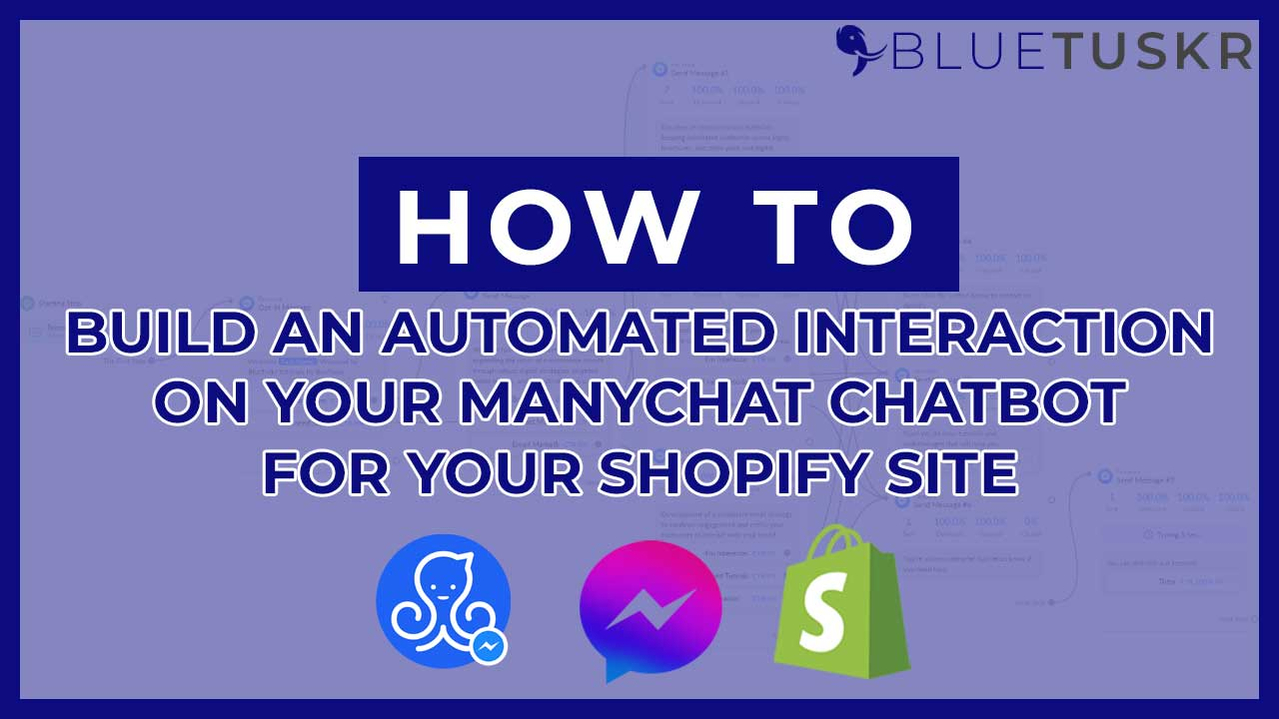
Build an Automated Interaction on Your ManyChat Chatbot for Your Shopify Site
In this tutorial, what we need to do is to connect your Facebook Messenger to Shopify, then connect ManyChat with the same Facebook account that you have connected to Shopify. After you have connected your ManyChat with Facebook, we will then set up your automated responses or interaction on ManyChat. In this way, you can interact automatically with your customers when they chat with you on your website. You can automatically interact with your customers even when you're away.
You can start by logging in to your Shopify and Facebook.
Connect Facebook Messenger to Shopify
The first thing that you need to do is to connect your Facebook Messenger to Shopify. We do have a previous tutorial that will walk you through connecting your Facebook Messenger to your Shopify. We will also give you an idea of how you may customize your client experience, in this lesson.
You can click this link to go to that tutorial. After you have connected your Facebook Messenger to your Shopify, you can then connect ManyChat with Facebook.
Connect ManyChat and Facebook
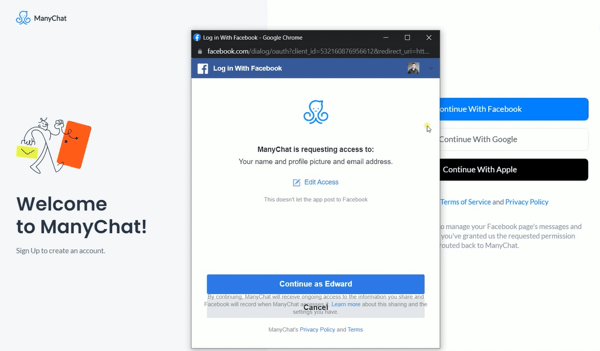
As a start, go to manychat.com. Click the Get Started Free button located upper right of the page. Since we will be using Facebook, click the Continue with Facebook option.
A popup will show up and since you already have logged in to Facebook, just Continue as your account. Grant ManyChat access to manage your page conversation. Click the Continue button.
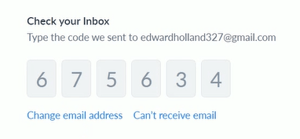
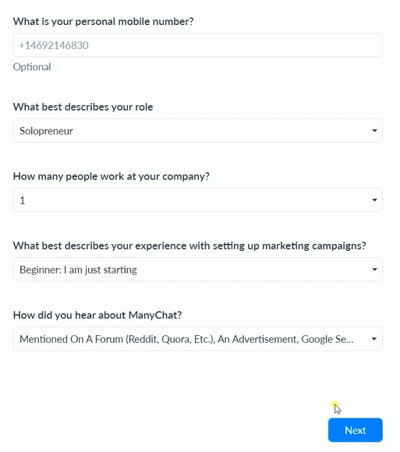
Enter your Email Address and click Next. We need to look for the code. You will be receiving a code from ManyChat with a code in it. What you need to do next is to access your email address and look for the email from ManyChat then copy and paste the code, on ManyChat.
On the next page, fill up the form and click Next.
Choose Facebook Messenger on the next page and select the Facebook page where you wanted to connect your ManyChat then click Next after you have connected your Page to your ManyChat.
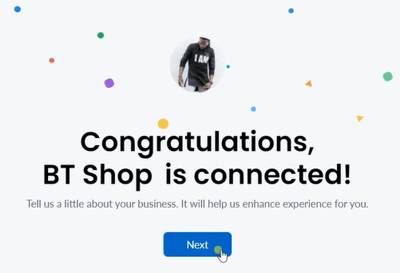
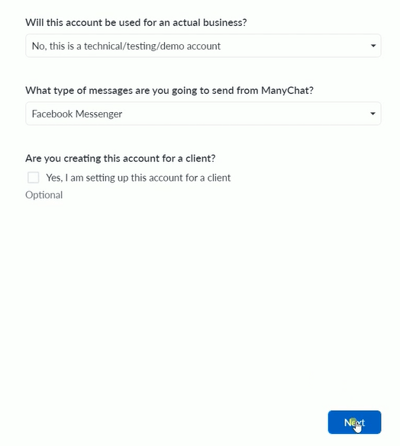
Fill up the next form. Select the way on how this account is used and select Facebook Messenger as the type of message that you'll be sending using ManyChat then click Next.
You now have a ManyChat account and you already have connected your Facebook account and Facebook Page. Now what we need to do next is to set up the automated interaction.

Set Automated Reply
Click the Automation located on the Left Side.
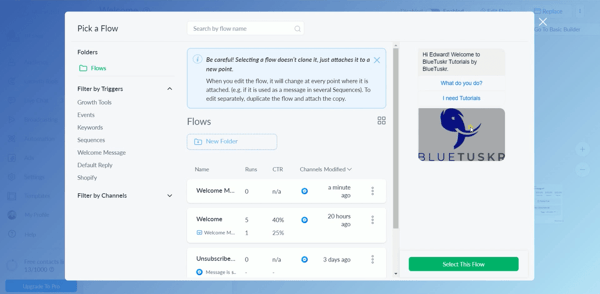
This is where you should see all of the flows that were created on this list. To create a new one, click the New Flow button located on the upper right.
There are templates that you can use but let's start from scratch. Select the Create Empty Flow.
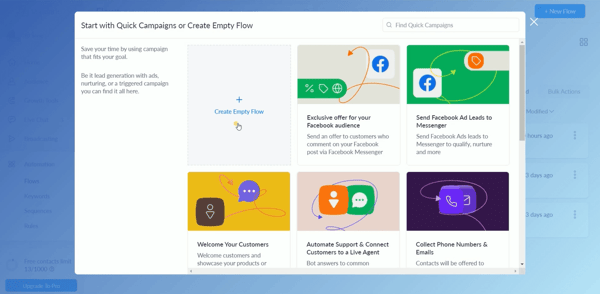
Name your Flow and click the Create button.
What we are going to create is just going to be a sample welcome message. We will just go through the process to introduce you to the tool.
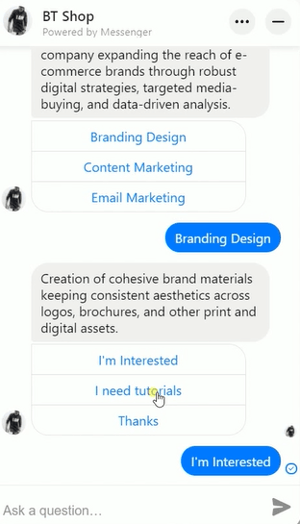
So we will be making a welcome message. Select the First Send Message and add a text. You can also add a dynamic name. Just click the bracket just right below the message and select the First Name. It is up to you to add any dynamic system field. You can also add a couple of items such as another text, image, card, gallery, file, and more.
So it will look more natural, you can add a delay before the message will be sent. Just click or drag Delay on top of your message.

Next is to add a button. These are options or different responses that your customers can choose. Just click the Add button and add a title. Then select the action that you want to happen after the button is clicked. You can also do that later. We will just add a second button.
Add another Step by clicking the Blue Plus button on the right and select the next step. For now, we will select Send Message. Just arrange it in a way that you can easily recognize it. Do the same thing that you did earlier. Like what we did earlier, add your text, delay, and buttons.
Now that we set our first reply, you need to connect it to the trigger action. We will be linking this to the "What do you do?" button. Just connect the button to the next message that you will be sending. In this way, if they click that button, it will automatically send the message that you connected to.
Let's set up a couple of different replies.
Let's add a button that will link to a website. Name the button and select Open Website. Enter your website URL and just leave the other settings and click Done. Let's set a couple of replies with buttons for website links.
You can then connect all of the buttons to the appropriate reply. We'll just set additional replies.

You can always publish your flow by clicking the Publish button located on the upper right.
If you also forgot something with the previous replies, you can just go back to it and click it. In this case, we'll add an image to our first reply. Delete any reply anytime by clicking the X beside the message and click Delete. Just publish it anytime to apply your changes.
Set the Default Welcome Message
Now that we have our flow completed, we will change the default welcome message. In this way, any new chats will be enrolled in this flow that you just created.
Click Settings on the left side and under Channels, select Messenger. Look for the Welcome Message section and Click Edit.
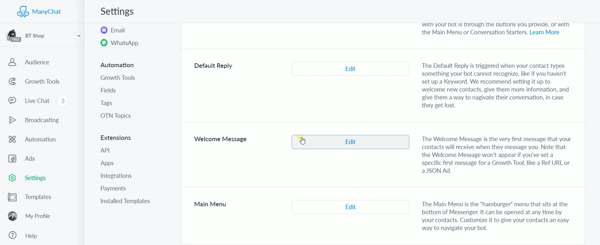
Click the Replace button on top and select the flow that you just created. You can verify the flow by checking it on the field.
Verify Setup
Since everything is all set, we need to verify the setup. Just go to your website where you have installed the Messenger chat and just chat with your bot and check your flow.
Since everything is set, you can be assured that any of your new chats will be enrolled in the flow that you set up. There are quite a lot of actions, triggers, or flows that you can set up and that goes on a different tutorial.
As we can see, Chatbots may be a fantastic backup for staff for relatively simple and repetitive activities. They are cost-effective, easy to build, manage, and utilize, and can be implemented quickly. The most important problem to which you must pay close attention is your chatbot's conversation capacity or "personality" in order to improve or simply keep your brand's reputation and consumers and for that, BlueTuskr is here to assist you. Interested in e-commerce strategy services? Contact our team at Bluetuskr, an e-commerce marketing agency.
Build an Automated Interaction Using ManyChat Chatbot for your Shopify Site Summary
1. log in to Shopify and Facebook
2. Connect Facebook to Shopify
3. Connect ManyChat and Facebook
4. Set Up your Automated Responses
5. Change Default Welcome Message
6. Review Flow on Website

Watch the video tutorial here:
Connect With Us
Recent Post
- Oct 28, 2023
- Author: Andrew Maff
Tips and Best Practices in Designing the Shopify Homepage

- Sep 12, 2023
- Author: Andrew Maff
How to Use Shopify AR & 3D Models to Boost Customer Engagement


Tell us what you think!