.png)
For you who didn’t know, Shopify is a subscription-based software that allows anyone to set up an online store and sell their products. Shopify offers many features and tools as well as it includes all basic eCommerce features such as analytics, marketing tool, shopping cart, reports, and mobile access. One of these features that Shopify is capable is connecting your store to Facebook.
In connecting your account to Facebook, you will be able to increase brand awareness using typical social indicators. Not only that, you can also easily increase your sales for your products will reflect on Facebook since 78% of American consumers say that they’ve discovered products on Facebook. You are also able to create an online store with fewer resources and doesn’t consume a lot of your time.
Now that you already know the perks in connecting your Shopify store to Facebook, we will walk you through on how to set it up.
Connect Your Shopify Store to Facebook
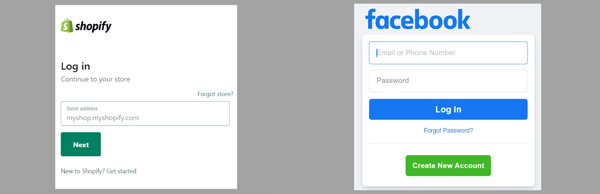
Login to Shopify and Facebook
To start off, login to your Facebook account at www.facebook.com and your Shopify Admin at www.shopify.com. Let’s start the setup on your Shopify Admin. We will be adding the Facebook on the Sales Channel.
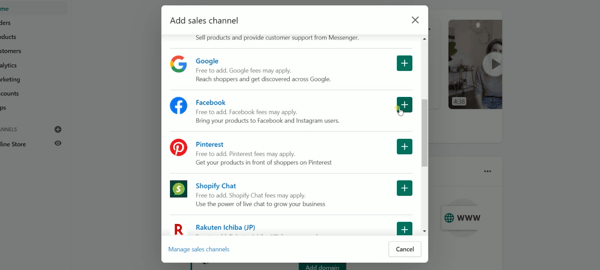
Add The Facebook Sales Channel
Click the Plus “+” button on the Sales Channel. Look for the Facebook on the list and click the green Plus button beside it.
On the next page you will be asked to confirm the sales channel integration. Scroll down to the bottom and click the Updated Sales Channel button.
What we need to do next is to setup your Facebook integration.
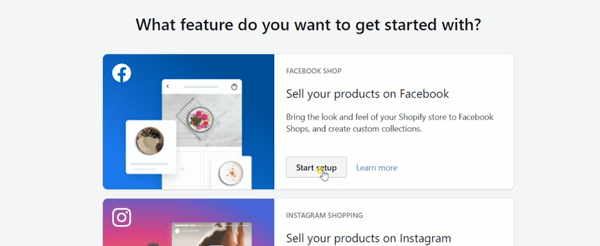
Connect Your Facebook Account
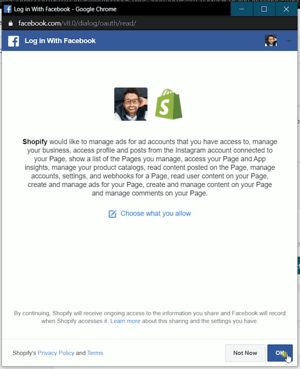
On the Facebook Shop click the Start Setup. Connect your Facebook Account, just click the Connect Account.
A pop-up will show up that will ask you to enter your Facebook password. Enter it and click Continue at the bottom. You will be asked to verify the integration. Make sure that you’re logged in to the correct account then allow Shopify to manage your Facebook Ads.
Connect Your Facebook Business Manager
After you have connected your Facebook account, it will detect if you have a business account. If you haven’t had a Facebook Business Manager account, you can visit business.facebook.com.
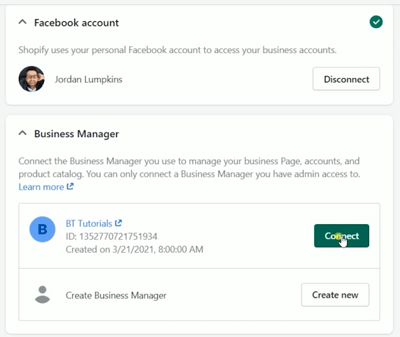
Just make sure that you are logged in to your personal account and just go through the process. Once you have created your Facebook Business Manager account, it will show up on the list on the Business Manager section. Just click Connect on the correct account.

Connect Your Facebook Page
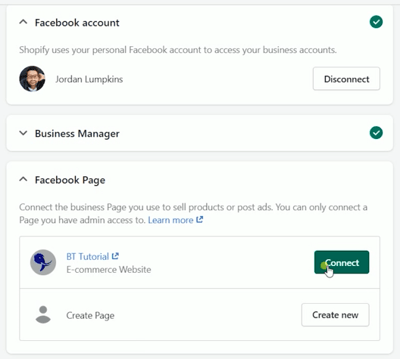
The pages that you have created on your Facebook personal account will show up on the list. Just click Connect to the correct page.
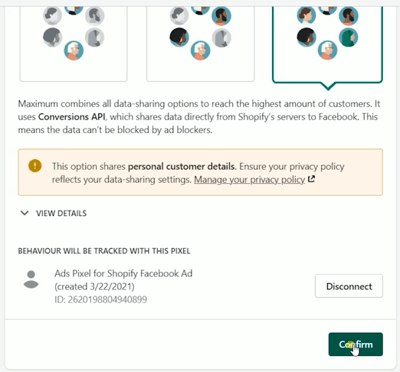
Enable the data sharing by turning on the switch and choose Maximum as your data sharing level. Right below it, click Connect to the correct Facebook Ads Id.
Setup Your Facebook Shop
Next is to setup your Facebook Shop using a Commerce account on Facebook. First that you need to do is to setup your Facebook Shop. Go back to your Facebook Page. Click the “More” drop-down and select Shop.
On the next page, click the “Go to Commerce Manager” button. Setup your Shop. Just follow through the setup wizard.
Click next on the first part which is Get Started. Choose the Checkout method. Since you want them to be directed to your website, choose the Website option and click Next.
Choose Sales Channel. Select the Facebook Page on where you wanted to show your products and click Next then enter your business email address.
Next is the Add Products. You actually don’t need to add anything here since it will be synced to your Shopify store. Just click Next.
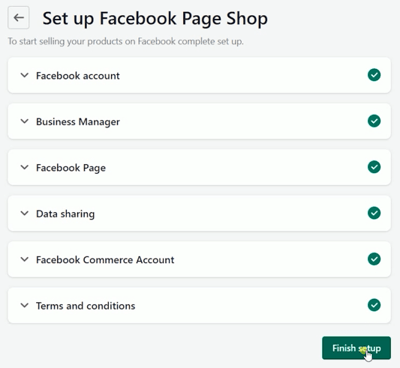
The last one is the Preview. Just agree to the Seller Agreement and click Finish Setup.
Since you just had this integration, it will go through an Approval Process on Facebook.
Finishing Setup and Expectations
Go back to your Shopify Admin and Finish the setup. You should see a notice that it’s complete but don’t get frustrated if your products won’t show up yet.
You will also notice that the Shop tab on your Facebook page has disappeared. The integration may be on the review process of Facebook. It may take 3-5 business days based on our experience.
Once it has been approved, you can just go directly to your Facebook Page or you can go to the Facebook Channel then click Customize Shop. On the catalog, you should see that the items on your Facebook catalog, reflects the products on your Shopify products.
Now that you have connected your Shopify catalog to your Facebook, your customers will be directed to your Shopify store once they purchase your product on Facebook.
Connect Your Shopify Store to Facebook Summary
1. Login to Shopify and Facebook
2. Add The Facebook Sales Channel
3. Connect Your Facebook Account
4. Connect Your Facebook Business Manager
5. Connect Your Facebook Page
6. Setup Your Facebook Shop
Interested in e-commerce strategy services? Contact our team at Bluetuskr, an e-commerce marketing agency.

Watch the video tutorial here:
Connect With Us
Recent Post

- Oct 28, 2023
- Author: Andrew Maff
Tips and Best Practices in Designing the Shopify Homepage

- Sep 12, 2023
- Author: Andrew Maff
How to Use Shopify AR & 3D Models to Boost Customer Engagement
- May 15, 2023
- Author: Andrew Maff
How to Start a Free Shipping Promotion on Shopify - Updated 2023


Tell us what you think!