.png)
Hey there, Shopify Newbies! Are you looking to create a seamless and branded checkout experience for your customers? Well, you're in the right place! Today, we'll be diving into a detailed step-by-step guide on how to customize the checkout in Shopify. So grab your favorite cup of coffee, sit back, and let's get started!
Customize Checkout in Shopify
Accessing Checkout Settings
The first step to customize your Shopify checkout is to access the checkout settings.
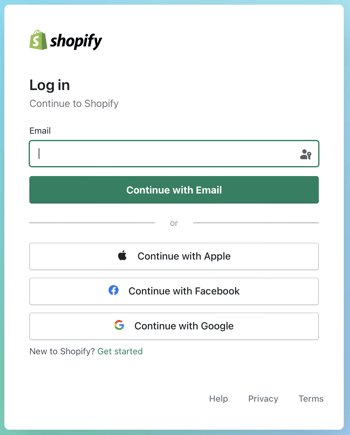
Log in to your Shopify admin dashboard. Go to www.shopify.com and log in to your account.
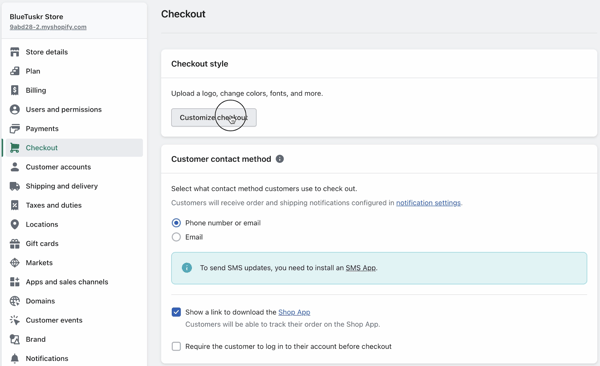
On the left sidebar, click on "Settings."
Now, click on "Checkout."
You should now see the checkout settings page where you can make various customizations.
Customizing Checkout Style and Branding
Now that you're in the checkout settings, it's time to customize the appearance to match your brand.
Under the "Checkout Style" section, click "Customize checkout."
Click the "Theme Settings" on the left side.
Then look for the "Checkout" section and click it.
You can change the background image of the Checkout and the logo.
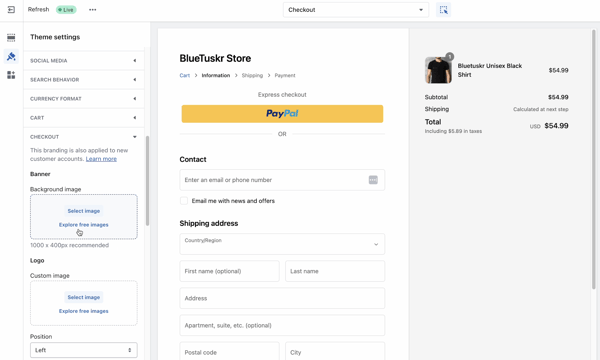
To upload your logo, click on "Select image" under "Logo" and choose the file from your computer.
You can also customize the main color by clicking on the "Color Box" and selecting your desired color.
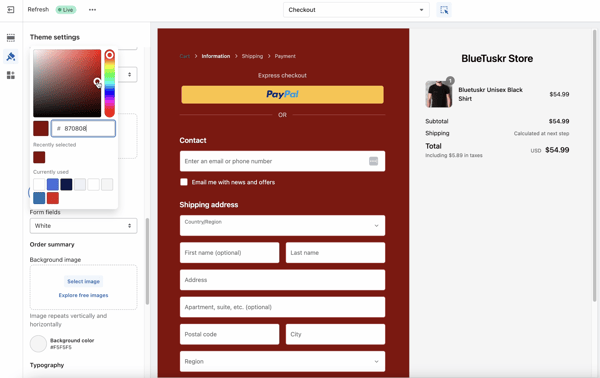
Don't forget to click "Save" in the top right corner.
Remember, consistency in branding helps improve customer trust and satisfaction!
Customizing Checkout Form Options
Now, let's move on to customizing the checkout form options. This allows you to decide what information you'd like to collect from your customers.
Go back to the "Checkout" section in Settings.
Scroll down to the "Customer Information" section.
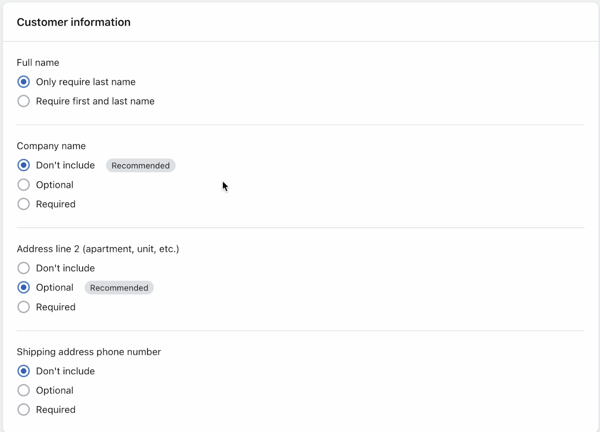
You can require your customer to provide their full name or just the last name.
Choose between "Required," "Optional," or "Don't Include" for each of the fields, such as company name, address line 2, and phone number.
Under "Order processing," decide if you want to enable or disable the "Use the shipping address as the billing address by default" option.
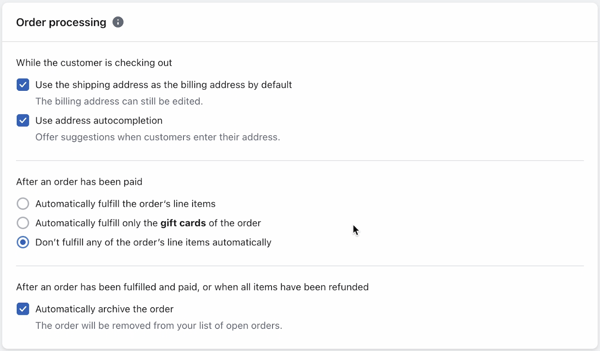
Save your changes by clicking "Save" at the top right corner.
Adding Additional Scripts
In some cases, you might need to add additional scripts for tracking or customization purposes. Here's how to do it:
Scroll down to the "Order processing" section.
Find the "Additional Scripts" box.
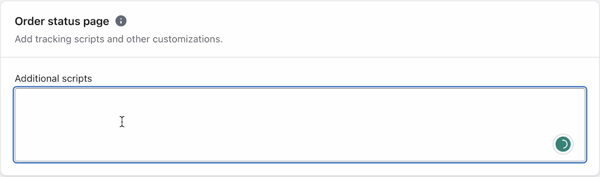
Paste your custom scripts (like Google Analytics or conversion tracking) into the box.
Click "Save" to confirm your changes.
Benefits
Customizing your Shopify checkout has several benefits, such as:
Enhanced brand experience
By matching the checkout appearance to your brand, customers enjoy a seamless shopping experience.
Improved customer trust
A professional and consistent checkout process helps build trust with your customers.
Increased conversions
Customizing form options and adding tracking scripts allows you to optimize your checkout process, leading to higher conversion rates.
Conclusion
And there you have it, folks! You've now learned how to customize the checkout in Shopify to create a seamless and branded experience for your customers. With this step-by-step guide, even as a newbie, you can enhance your online store and improve customer satisfaction. Until next time, happy selling! Interested in Amazon listing optimization services? Contact our team at Bluetuskr, an e-commerce marketing agency.
Customize Checkout in Shopify Summary
1. Log In to Shopify
2. Access the Checkout Settings
3. Customize the Checkout Style and Branding
4. Customize the Checkout Form Options
5. Add Additional Scripts
Watch the Full Video Here:
Connect With Us
Recent Post

- Oct 28, 2023
- Author: Andrew Maff
Tips and Best Practices in Designing the Shopify Homepage

- Sep 12, 2023
- Author: Andrew Maff
How to Use Shopify AR & 3D Models to Boost Customer Engagement

- May 15, 2023
- Author: Andrew Maff
How to Start a Free Shipping Promotion on Shopify - Updated 2023


Tell us what you think!