.png)
If you have posted a lot of things in Amazon Seller Central over the years, you’ll occasionally need to look up information on them. All of that data is kept on Amazon’s servers, and you can export the entire product list if you need to double-check it for accuracy or another purpose.
Most online retailers want to get their product data so they may utilize it on other platforms. However, most online sellers who grew their businesses on Amazon Marketplace did so by manually adding one thing at a time, adding themselves to existing product listings, or failing to arrange spreadsheets from their suppliers over time.
In this tutorial, we will walk you through how to export your product listings on Amazon seller central. This can be done on mobile, desktop or an Amazon Fire tablet.
Export Product Listings in Amazon Seller Central
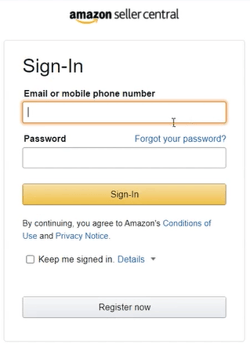
You can start by logging in to Amazon Seller Central. Go to sellercentral.amazon.com. Type in your email address and password in the field and click the sign-in button.
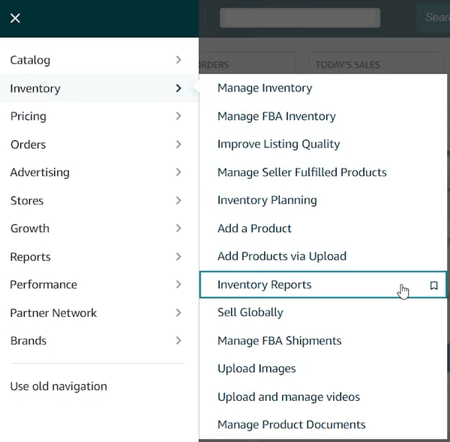
Once you’re in, what we need to do next is to go to the Inventory Reports Page.
Click the Menu button located on the upper left of the page. Hover your mouse to the Inventory and select Inventory Reports on the selection.
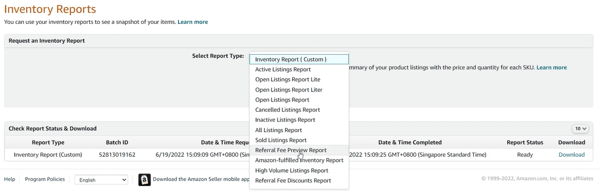
The Inventory Reports page is where you can download all of the details of your product listing.
You can choose the type of report that you wanted to be generated. Just click the drop-down and you should see a lot of selections. For now, let’s generate a custom report.
Select Inventory Report (Custom). You can customize the columns or the attributes that are included in your report. Just click the “Customize The Column for This Report” link.
The available attributes that you can add to this report are on the right and the included attributes on the report are the ones on the left.
Make sure you click the attribute that you want to add on the right and click the Add button in the center to add it to the left. The same goes for if you want to remove an attribute. Just select it on the left and click the Remove button in the middle.
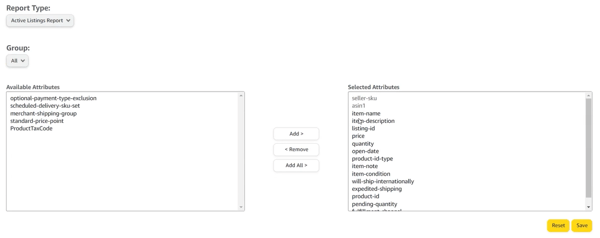
Once you’re all set, just click the Save button located at the bottom right. You can also reset the attributes included in the report by clicking the Reset beside the Save button.
To go back to the previous page, just click the Inventory Reports link on the upper right.
Now that we have everything that we need, just click the Request Report button.

The request is going to be generated by Amazon after. The status and the time stamp are going to be shown below. It may take 20 minutes for Amazon to generate the report and that depends on how many listings you have.
Once the report is ready, a download link will be generated below. Just click it and it will automatically download the reports that you have requested.

There are a couple of reports that you can still generate such as an Active Listing report and different attributes can also be included in the report. So just take advantage of this feature especially if you are expanding to other platforms.
So that’s how you Export Product Listings in Amazon Seller Central. See you soon at the next tutorial. Interested in an Amazon listing optimization service? Contact our team at Bluetuskr, an e-commerce marketing agency.
How to Export Product Listings in Amazon Seller Central Summary
1. Log in to Amazon Seller Central
2. Access the Inventory Reports Page
3. Choose the Report Type
4. Customize the Report Attributes
5. Generate The Report
6. Download The Report
Watch the Full Video here:
Connect With Us
Recent Post

- Oct 28, 2023
- Author: Andrew Maff
Tips and Best Practices in Designing the Shopify Homepage


- Sep 12, 2023
- Author: Andrew Maff
How to Use Shopify AR & 3D Models to Boost Customer Engagement

- May 15, 2023
- Author: Andrew Maff
How to Start a Free Shipping Promotion on Shopify - Updated 2023


Tell us what you think!