
.png)
Today, the image-focused social platform is preferred by everyone.
Pinterest is a visual search engine and productivity tool in addition to being a social network. Pinterest is a popular web destination for arts and crafts enthusiasts, ardent house decorators, and fashion bloggers looking for the latest style trends and fresh ideas. And with just that, Pinterest has an average of 454 million monthly active users worldwide as of the second quarter of 2021.
Pinterest permits users to “pin” photos from the Internet to self-made theme-based photo galleries known as pinboards, or simply “boards”. Smart marketers would love this concept since consumers' pin profiles indicate not just their aesthetic preferences, but also items and services they might be interested in purchasing.
Now since Pinterest users may have the potential to pin our photos, we will just direct them right away to the product page of our Shopify store. In this tutorial, we will tag our product on a Pinterest pin to save up your potential customer's time in looking for the item online thus increasing the possibility of closing the deal.
Tag your Shopify Products on a Pinterest Pin
Before we start, you can sign in to your Pinterest account and ready your product page so we can easily get the link whenever we need it.
It is also beneficial for you to create a Pinterest business account.
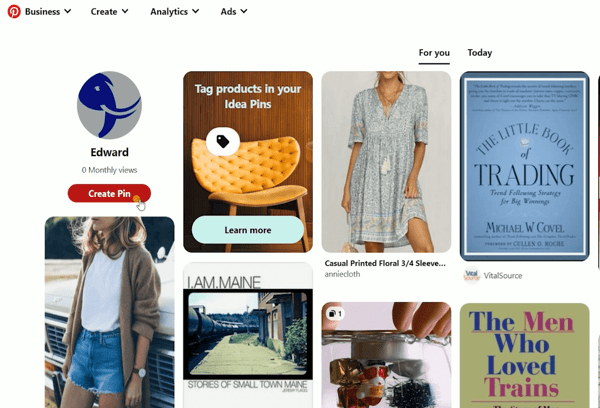
Create a Pin
On your Pinterest home feed, click the Create Pin.
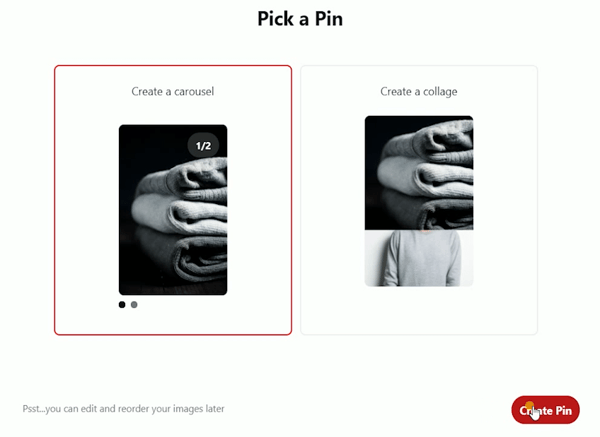
Add Your Image/s
Let's add an image first. Drag and drop the images that you will be posting. If you will have 2 or more pictures, you can do it as a carousel. If you are doing it as a carousel, tagging a product on your pin won't be possible. You can just add a link to each product.
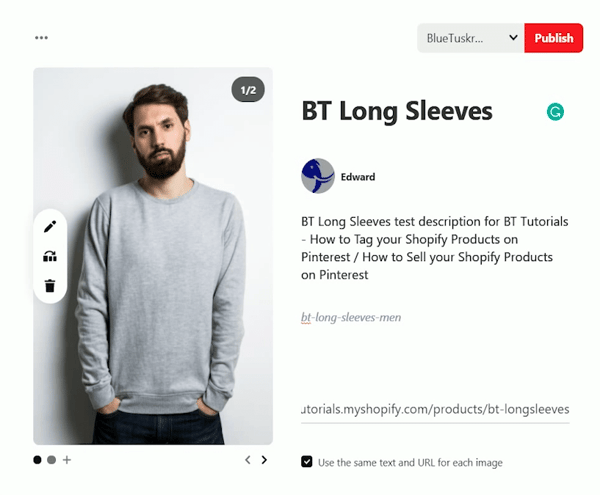
Add Pin Title and Description
Add a description for this pin. Limit your characters to 500. Just place in the important details that you wanted your potential customers to know. Add a little explanation on what people can see on your Pin or the alt-text and then add the destination link. This is where you will place the link to the product page.
Adjust your Image & Branding
Now that you're done with the text descriptions, you can now edit or adjust the appearance of your pin. Click the Pencil Icon just on the side of your image. You will be taken to the Crop feature. This is where you can adjust the aspect ratio of your image and adjust the orientation. You can also change your image here.
Click the Star Icon just right below the crop icon and this is where you can add your branding for your pin. This is only available on business accounts and is not available on personal accounts.
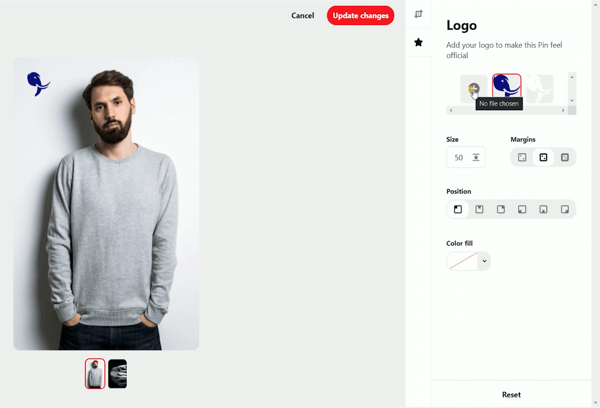
Upload your logo on the logo area. Just click the plus icon and select the images (I suggest that you have a logo for a light and dark background). Select the logo that you wanted to appear on your pin and adjust the size and where it's going to appear. You can use the margins for the spacing and position for the location of the logo. It's up to you if you would want to place a background fill for your logo. This is good if you wanted to place additional texts.
If you have multiple images, you can just do the same thing that you did earlier. It's much better if you have everything in uniform and consistent.
Once you're all set on how your image would appear, click the update changes. As of this moment, since this is a carousel, there were no tags yet. But we did manage to link this pin to your product page on Shopify. Every time someone clicks your pin, they will be directed to the product page that you have specified earlier.

Tag Products
Please be advised that even if you have deleted a photo, this won't convert as a single image since this was originally set up to be a carousel. You would need to delete every image and just upload a new one. But just make sure that if you wanted to tag a product, you only need to upload one image.

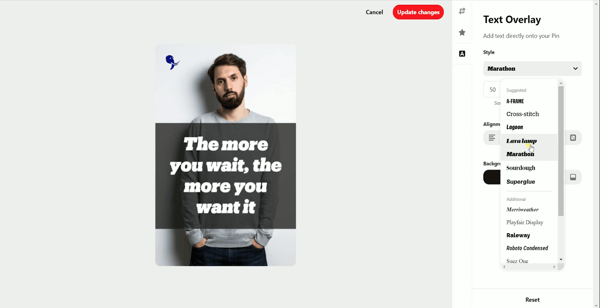
Now that we have uploaded just one image, the Tag feature is now available. There are also additional features such as the text option. You can now add text overlays on your pins.
You can add background to your text, change the font, adjust the size like how you add texts in any picture editor.
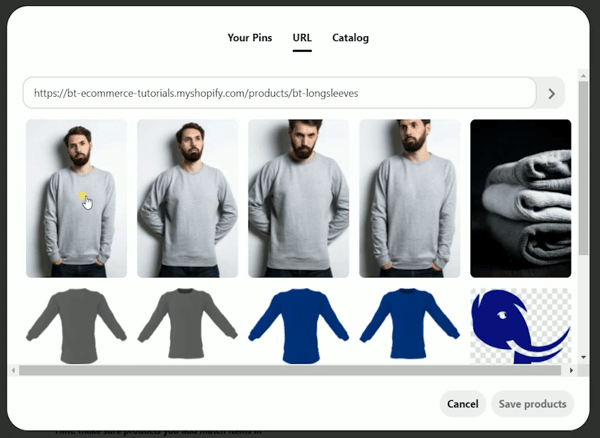
To add a tag, just click the tag icon beside the image. You can either use your previous pins that have some tags or you can add a URL with your Shopify Product description page.
On your URL, you are able to select the images. This is also not possible if you haven't installed your Pinterest Pixel on your Shopify. If you have multiple items in one photo, then this product tagging really suits your business well.
Once everything is all set, the only thing that you would need to do is to Publish This Pin.
You can then review how your pin would appear or promote this right away.
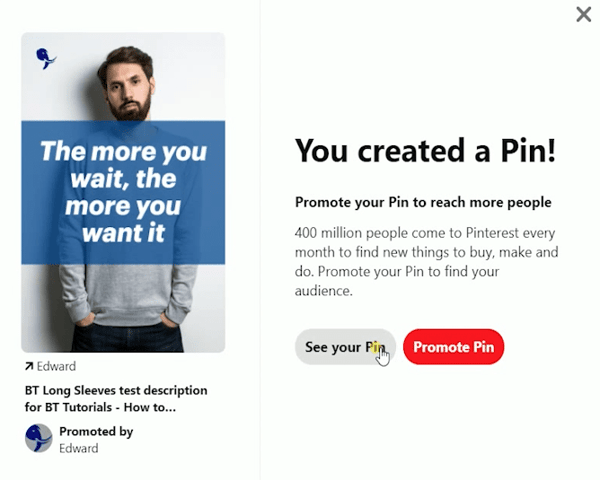
As you can see when we view the pin, you can see the tag icon located at the upper left of the image. Every time someone clicks your pin, they will be directed to the product page.
Please remember that the Pinterest community has high shopping intent, with over 83% of weekly pinners having made a purchase based on a pin they liked. This is made possible because of how the platform works and how sellers can set this up easily.
There are still a lot of good platforms out of there but Pinterest really does prove their numbers at a minimal cost. Interested in E-commerce social media services or e-commerce strategy services? Contact our team at Bluetuskr, ane-commerce marketing agency.
Watch the Video Here:
Connect With Us
Recent Post

- Oct 28, 2023
- Author: Andrew Maff
Tips and Best Practices in Designing the Shopify Homepage

- Sep 12, 2023
- Author: Andrew Maff
How to Use Shopify AR & 3D Models to Boost Customer Engagement
- May 15, 2023
- Author: Andrew Maff
How to Start a Free Shipping Promotion on Shopify - Updated 2023


Tell us what you think!