
.png)
Welcome to our comprehensive guide on sending a test email in Klaviyo. If you're new to the world of SaaS applications and email marketing, you're in the right place! In this detailed, step-by-step guide, we'll teach you everything you need to know about sending test emails with Klaviyo. We'll also cover the top 5 benefits of using test emails in Klaviyo to help you make the most of your email marketing efforts. Let's dive in
Send a Test Email
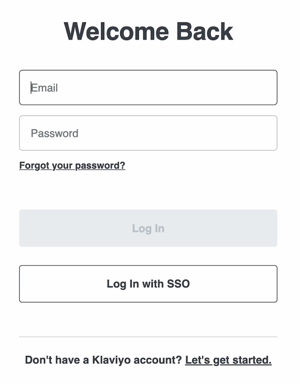
Log in to Klaviyo
To get started, log in to your Klaviyo account at klaviyo.com. If you haven't created an account yet, sign up for a free trial to begin exploring the powerful features Klaviyo has to offer.
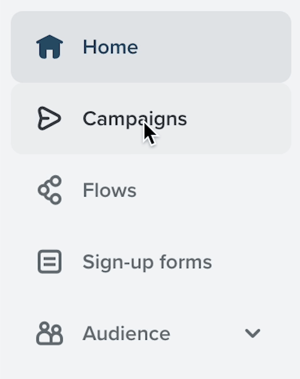
Access the Email Campaigns Dashboard
Once you're logged in, navigate to the 'Campaigns' tab on the left-hand side of your dashboard. This will take you to the 'Email Campaigns' page, where you can create and manage your email campaigns.
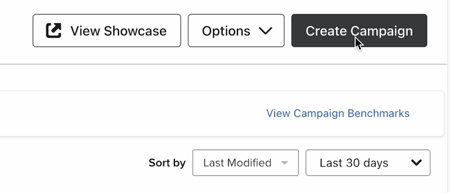
Create a New Campaign
Click the 'Create Campaign' button in the top right corner to begin creating a new email campaign. Enter a name for your campaign, choose the recipients, and click 'Create Campaign' to proceed.
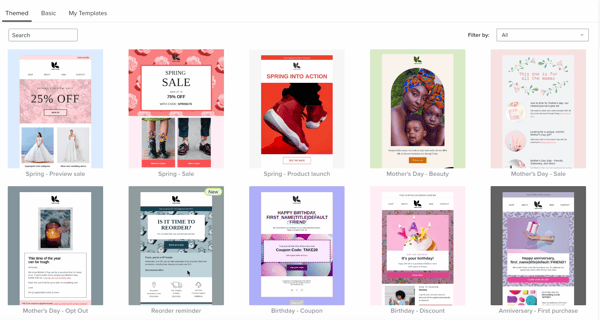
Select or Design Your Email Template
Klaviyo offers a wide range of pre-designed templates to choose from, or you can create your own custom template using the drag-and-drop editor. Select a template that suits your needs and click 'Edit Template' to customize it with your brand's logo, images, and text.
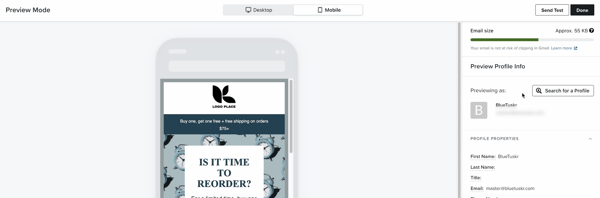
 Preview Your Email
After you've finished customizing your template, click the 'Preview' button in the top right corner to see how your email will appear to recipients. Review the content, layout, and links to ensure everything is perfect before sending your test email.
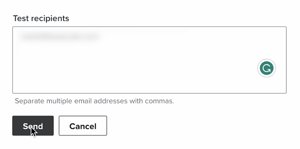
Send a Test Email
Click the 'Actions' dropdown menu next to the 'Save Content' button and select 'Send Test Email.' Enter your email address in the provided field, and click 'Send Test' to send the test email to yourself.
Review Your Test Email
Check your email inbox for the test email from Klaviyo. Open the email and carefully review its appearance and functionality. Make any necessary adjustments in Klaviyo and resend the test email until you're satisfied with the results.

Top 5 Benefits of Sending Test Emails in Klaviyo:
Identify and Fix Errors
Test emails help you catch and correct any formatting issues, broken links, or typos before your campaign goes live.
Optimize for Deliverability
Test emails allow you to ensure your email design and content won't trigger spam filters, increasing the likelihood of reaching your recipients' inboxes.
Test Personalization
Use test emails to verify that personalized elements, such as dynamic content and merge tags, are working correctly.
Assess Email Client Compatibility
Sending test emails helps you check how your email displays across various email clients and devices, ensuring a consistent experience for all recipients.
Boost Open and Click-through Rates
By sending polished, error-free emails, you'll create a more professional image, leading to increased engagement and improved campaign performance.
Conclusion
In summary, learning how to send test emails in Klaviyo is an essential skill for anyone new to SaaS applications and email marketing. By following our detailed, step-by-step guide, you'll be able to confidently send test emails and make the most of Klaviyo's powerful features.
Interested in e-commerce email marketing services? Contact our team at Bluetuskr, an e-commerce marketing agency.
Send a Test Email in Klaviyo Summary
1. Login to Klaviyo
2. Create a New Campaign
3. Choose and Customize a Template
4. Preview and Send the Test Email
5. Check and Preview the Test Email
Watch The Full Video Here:
Connect With Us
Recent Post

- Oct 28, 2023
- Author: Andrew Maff
Tips and Best Practices in Designing the Shopify Homepage


- Sep 12, 2023
- Author: Andrew Maff
How to Use Shopify AR & 3D Models to Boost Customer Engagement

- May 15, 2023
- Author: Andrew Maff
How to Start a Free Shipping Promotion on Shopify - Updated 2023


Tell us what you think!