.png)
Acquiring new customers can always be challenging for businesses and every penny that you spend should be accounted for Google Ads and your Shopify store can be very sensitive. Google AdWords is an advertising tool that focuses on a cost-per-click model of paying which you will be directing your customers to your Shopify website.
In this tutorial, we will walk you through setting up your Google Ads account, creating a Google Merchant account, and syncing your Shopify products to your Google Merchant account. In this way, your ads will show up on Google search and when a customer clicks it, they will be directed to your Shopify Website.
Connect Your Shopify Store and Google Ads
Before we start, there are a couple of things that you need to have.
- A Shopify Plan – Because we need to disable the password of your Shopify store and you need to have a Shopify plan for that.
- At least 1 active product on your Shopify Store
- A valid domain
- At least 2 Publicly Listed:
- Email Address
- Phone Number
- Physical Address
- Public Legal Pages
- Terms
- Refund Policy
- Return Policy
Once you have everything in check, make sure that you are using one email address for your Shopify and your Google account. In this way, it is much easier to sync the accounts.
So since you’re logged in to your Shopify Store, what we need to do next is to create a Google Ads account.
Create a Google Ads Account
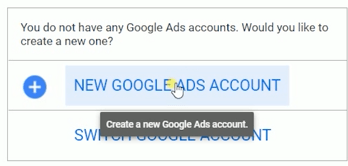
Just go to ads.google.com and Sign in to your account. If you haven’t had created an account yet, select the New Google Ads Account.
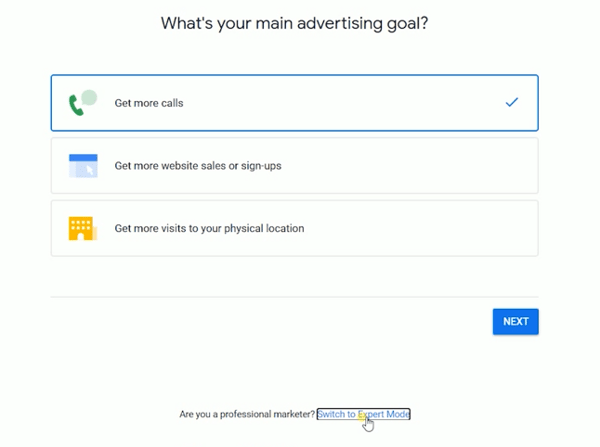
On the next page, click the Switch to Expert Mode and you just continue to create an account without a campaign. You can create a campaign later after you have set up the integration.
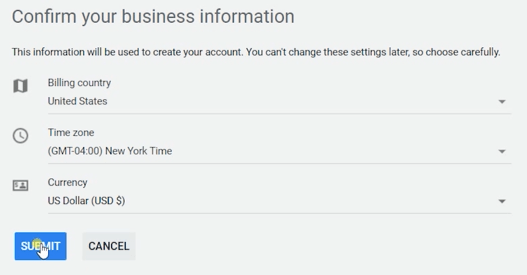
Confirm your Business Information by choosing the correct billing country, time zone, and currency, then click Submit.
So you’re good at creating a Google Ads account. Let’s not create a campaign yet but what we need to do is to create a Google Merchant account.
What’s going to happen is that your products need to show up in Google Search and you need to have a Google Merchant for it. Once a customer clicks your product on a Google search, they will be directed to your Shopify website.
Create a Google Merchant Account
Search Google Merchant Center on Google and the first link should be it.
Look for the Get Started button and click it so we can start creating a new account for you. Again, make sure that you are logged in with the same email address that you used in creating a Google Ads account.
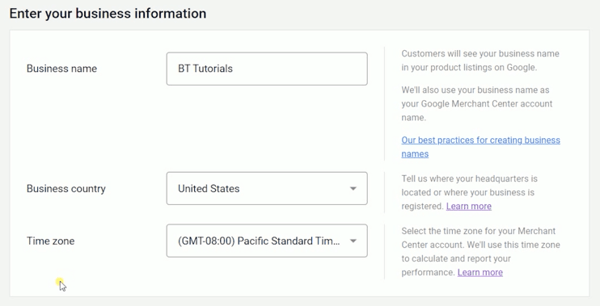
Enter your business information. Enter your business name, country, and the time zone that you’re in.
Where do you want your customers to check out? Just select On My Website since we will direct our customers to our Shopify Website.
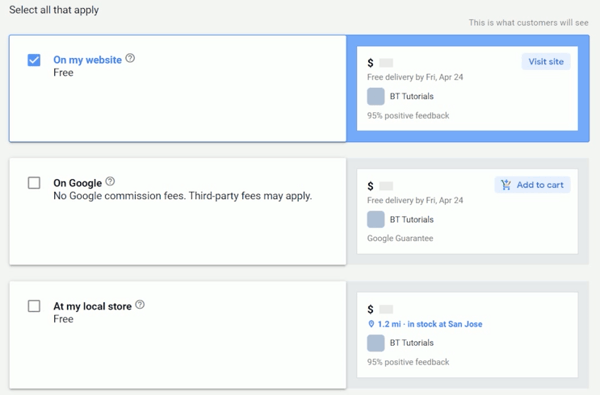
We won’t be doing Google check out for now for that’s going to be a different process. If you have a Physical Store, you can also check the option so customers will be directed to your store’s address when they want to check out an item.
For the tools that we will be using, we will just go with Shopify. Let’s just uncheck the invitations to test new features because we are not into that. Make sure that you agree to the Google Merchant Center Terms of Service then click Create Account.
Let’s set up the account. You can start by setting up the Tax. You can uncheck every state and not charge any tax. But if you are required to charge tax by your state, then please do so.
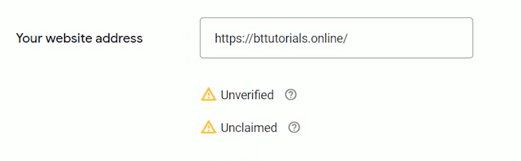
Let’s do the Shipping setup later since it’s optional. We need to add our website first. Enter your store address on the field.
At this point, your website needs to be free of password, this means that you must have chosen a plan on your Shopify for this to work.
Install the HTML Tag on Shopify
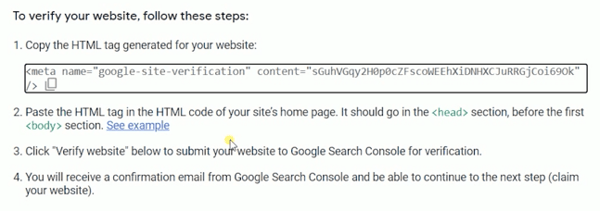
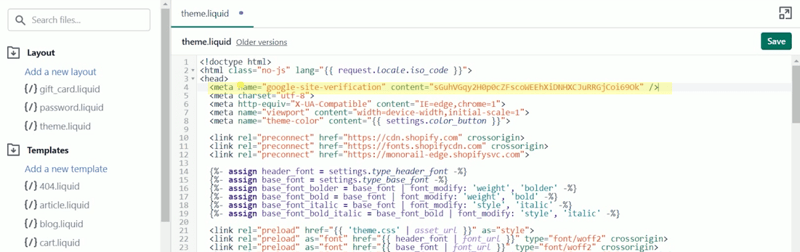
So as you can see, it is still unverified and unclaimed. What we need to do next is to install the HTML tag on your Shopify Store. On item number 1, you can copy the HTML tag that is generated and we need to paste this on the body section of your website.
Go back to Shopify and click the Online Store. Under Themes, click the Action drop-down and select Edit Code. Make sure that you’re on the Theme.Liquid file. Look for the opening Head tag. Just press enter to put a space and paste the HTML tag.
Turn of Your Store Password
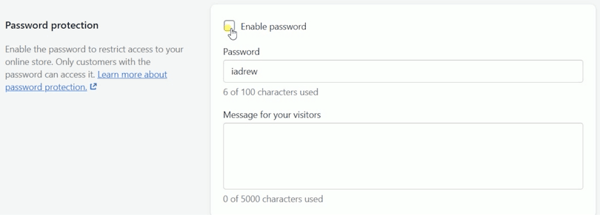
Turn off the password of your store. Under the Online Store, select Preferences. Click the Disable Password and uncheck the Enable Password on the Password Protection section and click Save. It should give you a prompt that your store is now live and is visible to customers.
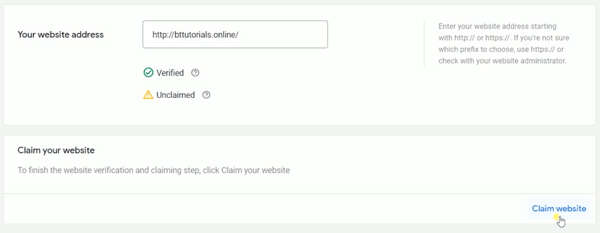
Go back to your Google Merchant and click Verify Website at the bottom. You should see the verified status, then at the same position, click the Claim Website and it should be claimed.
As you can see that the products have not been synced yet.

Install Google Feed on Shopify
The next thing that we need to do is to connect your Google Ads, Google Merchant, and Shopify. We can do that by installing an app on Shopify. Go to Shopify’s App Store and search for Google Shopping. Look for Feed for Google Shopping by Simprosys InfoMedia.
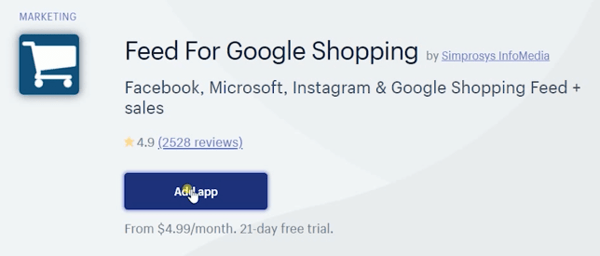
This is going to be for $4.99 or $5 a month and it comes with a 21-day free trial. That amount is just so small compared to the service that this app can provide you. This is definitely worth it and you should have this as one of your essential apps. We will set it up this way for this is the fastest and most convenient way in connecting all of those 3 platforms.
So you add and install the app on your Shopify Admin. You will then be taken to a different page. You will be asked to sign in to your Google account. Just click the Login with Google button.
Make sure that you log in to the same account that you have created your Google Merchant and Google Ads. Allow the app to manage your Google AdWords campaign, manage your product listing for your Google Merchant, and manage the list of sites and domains you control.
Setup Shipping
Choose the Merchant Id on the drop-down and click the Confirm your Account button.
Click the “Yes I’ve enabled programs” button on the next page. So it seems that we are still lacking the Shipping setup. To access the Google Merchant one more time and set up your Shipping.
Click the Plus Button to create a new shipping method. Enter the Shipping service name and select the service area then click Next. You can choose any of your preferred delivery times for this service but for this tutorial, I’m going to select Set a Range of Delivery Times.
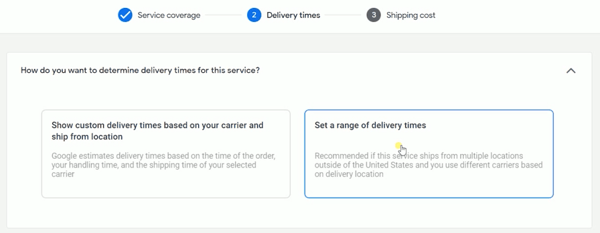
Set the Delivery time and just skip the Holiday Shipping Cutoff then click Next. Since I want this to be free shipping, then I’m going to choose this option and click Save.
So we now have added a Shipping Service. Let’s go back to the Simprosys window and complete the setup. Click the Test Shipping Rates and it should be successful.
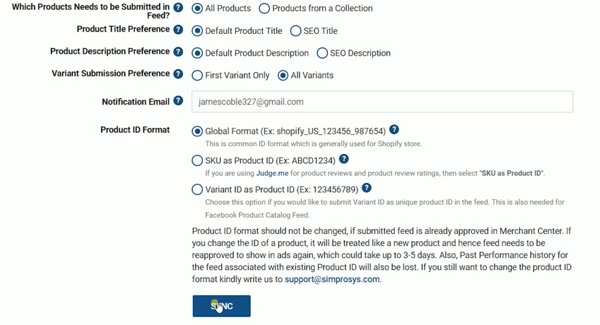
It should give you a green confirmation that your Google Merchant Center has been connected successfully and all that we need to do is to Sync the products. You don’t need to change any settings and just click the Sync button below.
Now that we are done, all we just need to do is to wait for Google’s Approval. As it’s shown here, that we just submitted our product feed for the first time and it may take 10 hours for it to show up on Google Merchant.
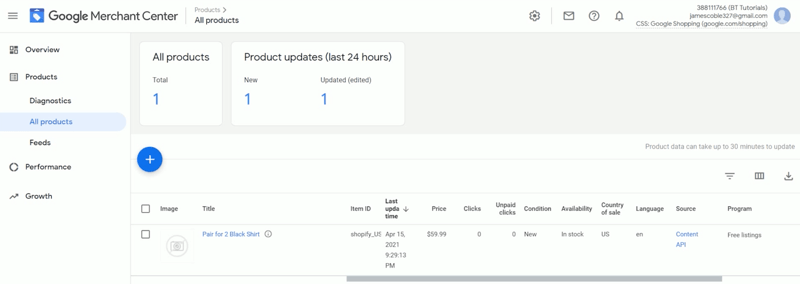
But once it is approved, you should see your product on Google Merchant. As you can see, that is the only product that’s active on our website, a Pair of 2 Black Shirts. Again the sync times may vary on how many products you have on your Shopify Store.
You can verify that the products have synced by going to your Google Merchant Account and the products should be there like what’s happening here.
So since everything is all set, with your customer activities on your Website, slowly the data should show up on Google AdWords as well.
So that is the easiest and most convenient way to connect your Shopify Store and Google Ads.
Whatever you need, we’re here to help. At BlueTuskr, we’re experts when it comes to Shopify Plus, e-commerce, branding design, content marketing, and more. We also offer many services to help you run your Shopify Plus store.
To learn more about how we can help you, contact us now.
We have years of experience helping our clients create winning strategies that leverage the power of e-commerce paid advertising services and tools.
Get started today, contact our team at Bluetuskr, an e-commerce marketing agency and find out how we can help take your online store presence and revenue goals to the next level this year!
Connect Your Shopify Store and Google Ads Summary
1. Login to Shopify and Google
2. Create a Google Ads account
3. Create a Google Merchant account
4. Install the HTML tag and disable your store password
5. Install Google Feed on Shopify
6. Wait for products to Sync

Watch the video tutorial here:
Connect With Us
Recent Post
- Oct 28, 2023
- Author: Andrew Maff
Tips and Best Practices in Designing the Shopify Homepage

- Sep 12, 2023
- Author: Andrew Maff
How to Use Shopify AR & 3D Models to Boost Customer Engagement
- May 15, 2023
- Author: Andrew Maff
How to Start a Free Shipping Promotion on Shopify - Updated 2023


Tell us what you think!