How to Start Selling Your Products on Amazon in 2023
If you want to sell products on Amazon, you need to use the right approach. While getting started isn’t necessarily difficult, it does take time, attention, and diligence to pull off.

By embracing the right strategy initially, you can set yourself for quicker success. If you’re wondering how you can start to sell your products on Amazon in 2021, here’s what you need to know.

Why Sell Products on Amazon
Before we dig into how you can sell products on Amazon, let’s take a moment to explore why Amazon is a great platform to use. After all, you have choices when it comes to launching an e-commerce business, so you may wonder if Amazon is the way to go.
One of the biggest reasons to start selling on Amazon is the retailer’s reputation. Overall, 89 percent of shoppers are more likely to spend money on Amazon than elsewhere. That alone is a big deal. Plus, the company boasts over 214.8 million users, showcasing just how popular the platform is with consumers.
When it comes to reach and popularity, Amazon is hard to beat. Plus, they provide sellers with a range of tools that can help them succeed. After all, when a seller thrives, so does Amazon, so the company has a vested interest in your success.
If you’d like to see what it takes to sell products on Amazon, here’s an overview of the process.
How to Start to Sell Products on Amazon
1. Find a Winning Product Niche
While it might seem like your first step should be choosing a business name, getting a license, or signing up for an Amazon seller account, that isn’t actually the case. Instead, you need to figure out what products are worth trying to sell on Amazon in the first place.
Generally speaking, a winning product niche is going to offer strong demand with limited competition. If you can find a market segment that customers focus on but where very few product options are available, you could have a winner.
While you can let your passion guide you to a category, don’t rely on that alone. You want to use product research tools that can help you pinpoint genuine money-making opportunities. After all, your main goal is to be profitable, so it’s best to find underserved niches that are brimming with potential above all else.
Once you find some options, do some additional research. Exactly what you’ll need to do depends on your approach to sourcing. If you plan on making the products yourself, you will want to explore production, packaging, and similar costs. If you plan on working with a dropshipping supplier, wholesaler, or manufacturer, spend a little time finding out who offers the products you want to sell on Amazon.
Even the best product niche isn’t viable if you can’t source the items. So, if you think you’ve got a winner on your hands, do some basic digging to make sure what you want to offer is either available or creatable. If you can secure that product with relative ease, great. If not, go back to the product research tools and see what else you can find.

2. Write a Starting Business Plan
A business plan helps you get your proverbial ducks in a row. It ensures you don’t overlook a critical piece of information during the initial phase of launching your Amazon seller business, and can serve as a guide for additional crucial research.
You’ll usually need to collect some financial details while creating your business plan. For instance, if you’re sourcing private label products directly from a manufacturer and intend to take advantage of the Fulfillment by Amazon (FBA) program for your fulfillment center, then you should start estimating how much it costs to go that route.
Writing your initial business plan isn’t about getting every piece of information exactly right. Instead, you want to craft a solid framework with reasonable estimates. As you move forward with preparing to sell products on Amazon, you can refine your business plan. That way, in the end, it’ll be optimized, thorough, and accurate.

3. Decide on a Company Name
Having a company name is a must. It allows you to set the tone for your Amazon business, enabling you to determine where your focus lies and how you stand out from the crowd.
Many aspiring sellers are surprised at how lengthy this step can be, mainly because you have to pick a business name that isn’t really in use elsewhere. Typically, the best place to start is by heading to the United States Patent and Trademark Office database. There, you can see if your preferred name is already registered.
However, you also want to go further. Check out your Secretary of State’s website to see if anyone in your area using the same or a similar name. Running a Google search is also a good move, as it lets you see if the name is being used informally by someone else, if it appears in fiction literature, or has any other connections to something that exists now or did in the past.
Even if you only intend to sell your products on Amazon, you should also see if anyone is using your preferred business name as a URL. Again, this is all about discovering whether the name is fully available or if it may be connected to anything that’s operating today.
4. Choose a Legal Structure
When you launch a company, you need to choose a legal structure for it. There are numerous kinds of business entities, each offering up unique benefits and coming with its own set of drawbacks.
Generally speaking, you’ll need to choose from the following:
- Sole Proprietorship
- Partnership
- Limited Liability Corporation (LLC)
- Close Corporation
- B Corp
- C Corp
- S Corporation
Which one represents the best fit depends on your overall goals for your company, as well as some additional factors. After researching what each one entails, you may want to consult with a business attorney if you aren’t confident about your choice. They can provide you with formal guidance, ensuring you make the best choice for your Amazon business.
5. Request an EIN
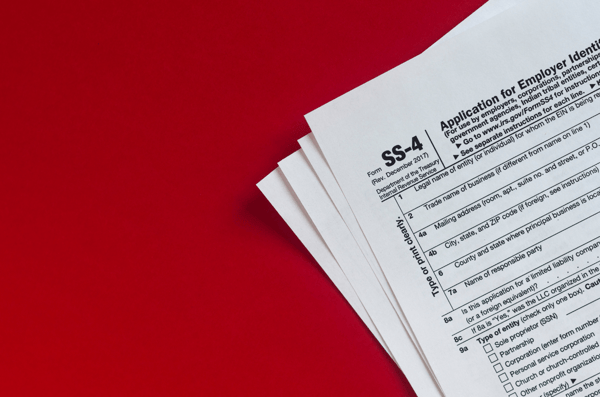
With an employer identification number (EIN), you have the ability to separate your business and personal financial lives. That means it’s a good idea to have one even if you choose a legal structure that doesn’t require it, such as a sole proprietorship.
Getting an EIN is incredibly simple. You can head over to the IRS website, follow the onscreen instructions, and get one right away.
 6. Get Your Licenses and Permits
The business structure you choose plays a big role in the licenses or permits you need to operate. Generally, sole proprietorships don’t have to register their business, though most others do.
What is required can vary depending on your state and city. However, completing the licensing and permitting process isn’t generally difficult. If you’re operating out of your home, you won’t need the same permits that a brick-and-mortar retailer has to have in most cases. But rules can vary by region, so you’ll need to check with your state and city to make sure you take care of the necessities
If you aren’t sure where to look for that information, starting with your local Small Business Administration (SBA) office is a good idea. They can help you figure out what licenses and permits you need for your specific kind of business.
However, you can also do a simple Google search. Enter in your city, state, and terms like “business permits” or “business license” and see what you find.
7. Tackle Your Branding
While it may not seem like an Amazon seller needs a lot of branding, that isn’t the case. The aesthetics of your company matter, so it’s smart to spend some time getting various aspects in order.
For example, you’ll need a company logo that can represent your business. If you’re doing private labeled products, then you’ll want labels. You may also want some visual branding that can help you promote your products on social media or in ads.
There are a variety of tools that can help you create your own branding. However, if you’re new to design, working with a freelancer or design firm may be a better approach. That way, you can ensure professional results and that your branding doesn’t encroach on another company’s intellectual property, copyright, or trademark.
8. Choose Your Amazon Seller Plan
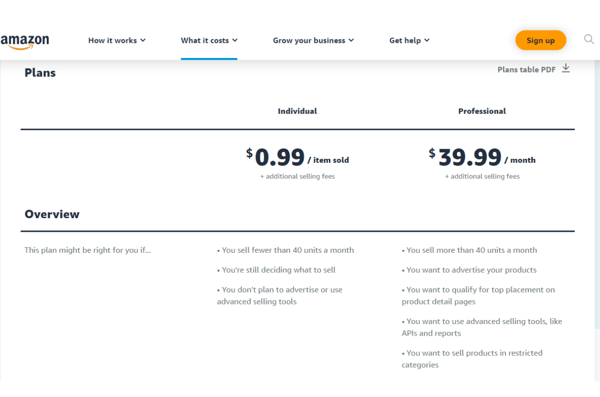
Amazon has a few plan options that sellers can choose from, each of which with a unique fee structure. Your first big decision is to select between an Individual and Professional account.
With the Individual plan, you pay a $0.99 fee on every item you sell, but you avoid a recurring monthly cost. This may be ideal for sellers operating with smaller volumes, as it could represent a savings opportunity.
Otherwise, the Professional plan comes with a monthly fee of $39.99. With that, you don’t pay a fee every time you sell a product. It’s essentially a flat-rate, making it predictable. Plus, for high-volume sellers, it can represent a bargain.
9. Understand the Referral Fees
Now, Amazon seller plan fees aren’t the only fees you have to pay. Regardless of the plan you choose, you also have to deal with referral fees.
Referral fees are essentially a commission you pay to Amazon. Amazon collects a specific percentage of the sale price based on your product’s category. Usually, the referral fee is about 15 percent. However, some are below 10 percent, and others are above 20 percent.
Before you select a product to sell on Amazon, take a look at the referral fees. This will help you estimate how much it costs to use the Amazon platform for that specific item, which is critical for planning.
10. Figure Out Fulfillment
While it may seem odd to settle on a fulfillment option before you actually order or produce products, it’s wise to get this figured out in advance. The fulfillment approach you choose impacts your costs, as well as how much time you personally have to spend on fulfillment activities.
If you decide to go with the FBA program, you do get some benefits. You may be able to list your product’s as Prime Eligible, for one. For another, Amazon will provide you customer support options, including communicating with customers about orders, handling returns, and more.
Review Amazon’s FBA fulfillment fees to see if you’ll get enough value from the program. If not, then you can always choose to handle your own fulfillment or work with a third-party. If you go that route, then you’ll need to estimate your costs, time commitment, and more, updating your business plan accordingly.
Additionally, you may need to start coordinating with the fulfillment center at this phase. After all, you’ll need to be able to send your product orders or manufactured items somewhere, so it’s wise to start getting those ducks in a row now.

11. Open an Amazon Seller Account
You can’t sell products on Amazon without a seller account. Since you’ve already researched your account options, you should have a solid idea of which approach will best meet your needs.
The registration process is fairly straightforward. Along with basic business information, you’ll also have to provide a credit card number and bank account details, ensuring you can cover your fees and receive proceeds from your Amazon sales with ease.
In some cases, such as if you’re new to the world of being an e-commerce seller, you may want to open separate business bank accounts and credit cards. This makes keeping your professional and personal financial lives apart easier to manage. However, that isn’t technically a necessity, so keep that in mind.
12. Place Product Orders (or Start Production)
Once your account is open, it’s time to get your products ready. If you’re working with a supplier, then this usually involves placing an initial order. Many sellers choose to start small, giving them a chance to test the waters both with the supplier and the product itself.
If you’re using a fulfillment center, you’ll also need to coordinate delivery to that location. The process may vary depending on the fulfillment center you choose, so refer to the location’s information or contact its customer service to see what you need to do.
13. List Your Product on Amazon
After your products are ready to ship, you can list the items for sale on Amazon. That way, customers can make purchases, getting your business up and running.
Along with clear product titles and descriptions, you also need to include clear images. Additionally, embrace SEO best practices as you create the listings, increasing the likelihood that your product will appear in organic search results.
14. Proactively Manage Your Inventory
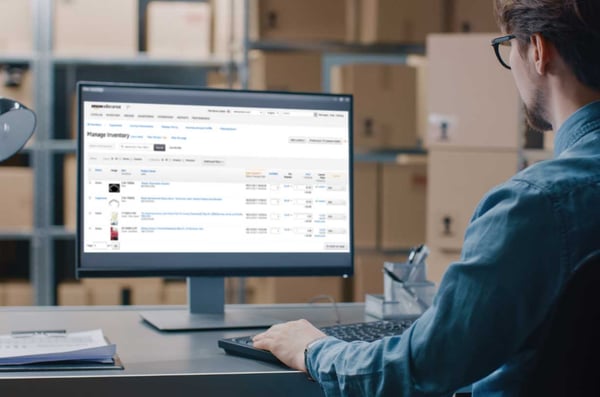
As you start getting sales, keeping an eye on your inventory levels is a must. That way, when your inventory begins to run low, you can place a new order with your supplier or make sure your manufacturing rate can replenish the stock.
If you work with a fulfillment center, you may get access to tools that help you monitor your inventory. Additionally, Amazon seller accounts have tracking capabilities. However, you may want to go with some inventory management software, too, particularly if you plan on expanding into other channels down the line. With those solutions, you can centralize your inventory management, which may make it easier to oversee.
15. Optimize Your Product Listings
Once your listings are generating sales, start tracking the results. If you are lagging behind competitors, then you may need to optimize your listings to snag a bigger part of the market.
Begin by reviewing competitors’ listings. See if they are using keywords or approaches that differ from yours. If so, you may want to update your listings, allowing you to secure more interest and boost sales.
16. Follow Up to Secure Feedback
Many Amazon customers rely heavily on reviews when making purchasing decisions. Make sure to monitor any customer reviews you receive, as well as request all buyers leave feedback. Positive reviews can help boost sales, so it’s wise to be diligent about this part of the process.

17. Start Marketing
As you hone your listings and collect reviews, you should also venture into the world of advertising. Whether you focus on leverage social media or take advantage of Amazon programs – like Amazon Sponsored campaigns and Amazon Lightning Deals – may depend on your current sales numbers, budget, and other factors.
However, in any case, it’s smart to get the process going. Getting your marketing optimized takes time, so, the sooner you start, the sooner you can start seeing positive results.
18. Keep Exploring
Remaining competitive as an Amazon seller is a continuous process. Keep an eye on product trends to spot potential opportunities that could spell success in your niche. Additionally, keep an eye on emerging keywords, as those could help you secure more customers.
While optimizing your listings and product selection takes effort, it’s worth doing. That way, you can stay one step ahead.
Interested in an Amazon listing optimization services? Contact our team at Bluetuskr, an e-commerce marketing agency.
Connect With Us
Recent Post
.png)


Tell us what you think!